Mini pizzas feel like a little rebellion in the kitchen—tiny, customizable, and perfect for mixing and matching flavors. I love how they turn a simple snack into a creative canvas, especially when I get to experiment with unconventional toppings like roasted sweet potatoes or spicy chorizo. Making them from scratch isn’t just satisfying; it’s a chance to get playful with dough and flavor combos, no matter the occasion.
What really draws me to mini pizzas is how they invite everyone to join in. Kids love the chance to pick their own toppings, and adults enjoy the little bursts of flavor from unexpected ingredients. It’s a casual way to serve something warm and homemade, without the fuss of a big pizza or complicated recipes. Plus, they’re just the right size for nibbling, whether it’s a quick dinner or a party snack.
There’s something about customizing each mini that makes the process feel personal and relaxed. I’ve found that using different doughs—like whole wheat or flavored varieties—adds an extra layer of interest. These tiny pies remind me that sometimes, the simplest foods are the most fun to make and share, especially when you’re turning humble ingredients into something special.
Focusing on making mini pizzas with a unique twist by using unconventional toppings and dough flavors, turning a simple snack into a personalized, crowd-pleasing art.
Tiny Pizzas, Big Creativity
- These mini pizzas remind me of childhood sleepovers, where everyone grabbed their favorite topping and shared laughs.
- I felt a rush of pride when I made dough from scratch for the first time—tiny, perfect circles that baked up crisp and golden.
- There’s a quiet joy in customizing each mini, watching flavors come together in little bites that pack a punch.
- Cooking these always sparks chaos in the kitchen—flour dust on the counter, cheese melting too fast—but it’s worth every mess.
Tiny Pizzas, Big Creativity
These mini pizzas came about during a chaotic weekend when I had a fridge full of odds and ends and a craving for something homemade but quick. I realized that turning small, personal-sized pizzas into a canvas for all my leftover toppings made the process both fun and stress-free. It’s become my go-to for when I want something warm and satisfying without the fuss of a full pizza, especially on busy nights or casual get-togethers.
Mini Pizzas’ Surprising Roots
- Mini pizzas likely originated in Italy, where small, personal-sized versions of traditional pizza evolved to suit quick snacks and street food culture.
- During the 20th century, especially in American diners and casual eateries, mini pizzas became popular as fun, shareable appetizers and party snacks.
- The concept of customizing tiny pizzas with various toppings mirrors traditional Italian antipasti platters, but with a playful, portable twist.
Ingredient breakdown: key components
- All-purpose flour: I love the slightly chewy texture it gives, but you can swap in bread flour for more chew or whole wheat for nuttiness—just expect a denser crust.
- Yeast: Active dry yeast is what I use to get that airy rise, but rapid-rise works in a pinch—just skip proofing and mix directly into the flour.
- Tomato sauce: Bright, slightly sweet, and smoky—my go-to is a simple canned crushed tomato with garlic and a splash of olive oil. Use marinara for convenience or fresh pureed tomatoes for a fresher taste.
- Cheese: I prefer mozzarella for that gooey stretch, but a mix of mozzarella and provolone adds complexity. For a sharper tang, sprinkle some Parmesan on top after baking.
- Toppings: I often use spicy chorizo or roasted veggies, but feel free to get creative—think caramelized onions or sliced olives. Just keep toppings thin for even cooking.
- Olive oil: Drizzle a little before baking for a golden finish and extra flavor. A fruity extra virgin oil makes a noticeable difference in aroma and color.
- Herbs & spices: Fresh basil or oregano brighten things up, but dried works fine if you crush it between your fingers to release the oils—just don’t overload the tiny pies.
Spotlight on key ingredients
Mozzarella cheese:
- Mozzarella: I love how mozzarella melts into gooey, stringy perfection in the oven. Its mild flavor balances rich toppings, and it browns beautifully for a golden crust edge.
- Mozzarella: When baking, it releases a subtle, milky aroma and forms a slightly crispy top layer, giving each bite that satisfying stretch.
Tomato sauce:
- Bright, tangy, with a hint of smoky sweetness. It bubbles quickly, spreading a rich aroma that pulls you in.
- It can be thick or slightly runny—avoid overloading to prevent soggy bases. Fresh herbs in the sauce elevate the flavor profile.
Notes for ingredient swaps
- Dairy-Free: Use vegan mozzarella or cashew cheese for a creamy, cheesy flavor without dairy. Expect a slightly different melt and stretch.
- Gluten-Free: Swap all-purpose flour with a gluten-free blend. The texture will be a bit more crumbly, but still delicious.
- Low-Sodium: Choose low-sodium tomato sauce and cheese to control salt. Tastes a bit milder but healthier.
- Vegetarian: Skip meats and load up on roasted veggies or fresh herbs for bright, plant-based bites.
- Spicy Toppings: Add sliced jalapeños or chili flakes for extra heat. Be mindful—toppings may release more moisture.
- Olive Oil: Use flavored oils like garlic or chili oil for an aromatic twist. They add a punch of aroma and color.
- Herbs & Spices: Fresh herbs are vibrant, but dried work fine—just crumble between fingers to release flavor.
Equipment & Tools
- Rolling pin: To evenly flatten the dough
- Baking sheet: To hold and bake the mini pizzas
- Parchment paper: To prevent sticking and make cleanup easier
- Mixing bowls: For preparing toppings and dough
- Spoon or small ladle: To spread sauce evenly
Step-by-step guide to mini pizzas
- Gather all your ingredients and preheat your oven to 220°C (430°F).
- Prepare your workspace: set out rolling pin, baking sheet, and mixing bowls.
- Roll out your dough on a floured surface to about 0.5 cm thickness, aiming for 10-12 small circles, roughly 8 cm diameter each.
- Transfer dough rounds onto a parchment-lined baking sheet, spaced enough to prevent sticking.
- Spread a thin layer of tomato sauce on each dough circle, leaving about 1 cm border around the edges.
- Add your toppings: sprinkle shredded cheese, place your chosen proteins or veggies, and finish with herbs or spices.
- Drizzle each mini pizza with a little olive oil for golden edges and flavor.
- Bake in the oven for 10-12 minutes, or until the crust is golden and cheese is bubbling.
- Check for doneness: crust should be crisp, cheese melted and slightly browned, toppings cooked through.
- Remove from oven and let rest for 2 minutes; this helps the cheese set, making them easier to serve.
- Finish with a sprinkle of fresh herbs or a drizzle of olive oil if desired, then serve warm.
Let the mini pizzas rest for 2 minutes out of the oven to settle. Finish with fresh herbs or a drizzle of olive oil if desired, then serve immediately while warm and gooey.
How to Know It’s Done
- Crust is golden and crisp at the edges.
- Cheese is bubbly and slightly browned.
- Toppings are cooked through without burning.
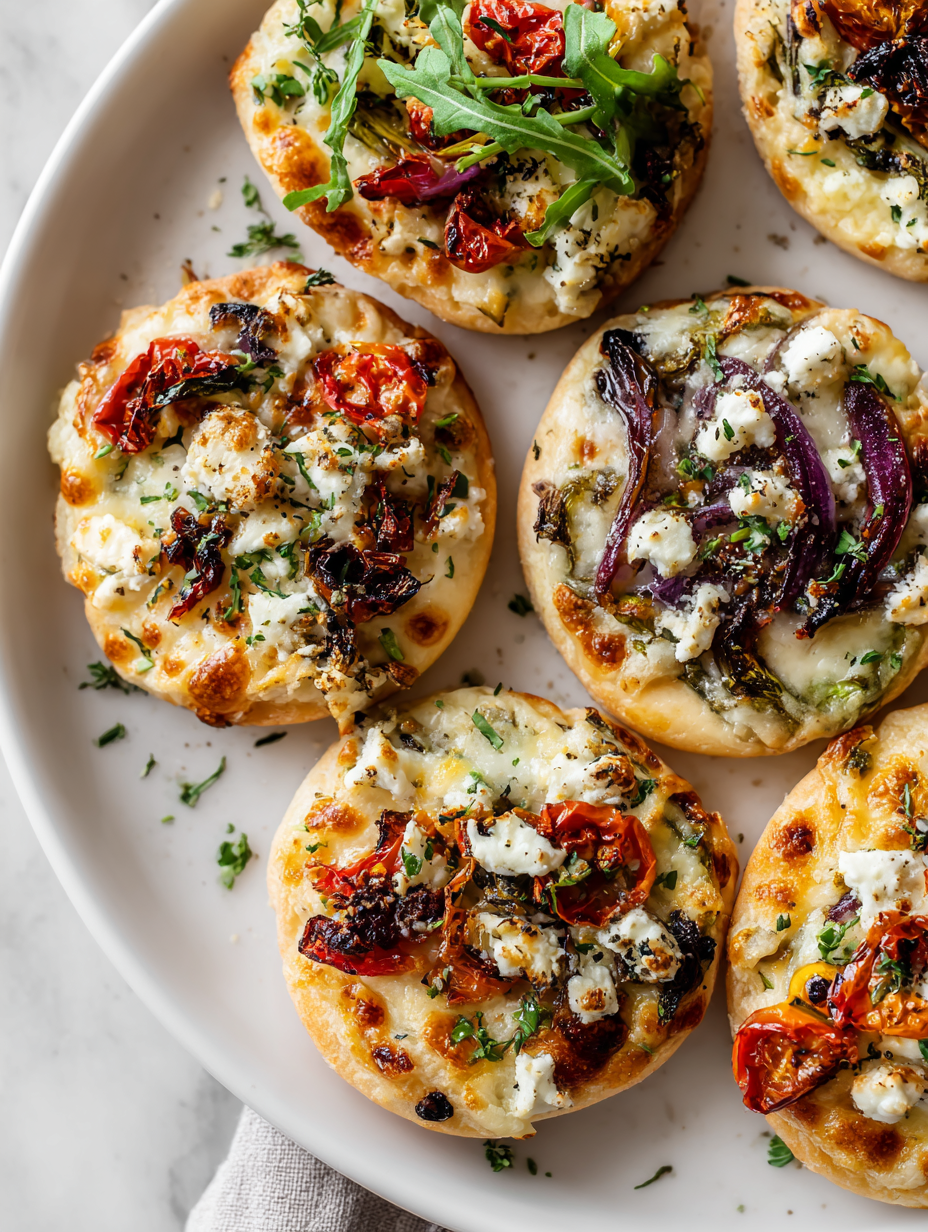
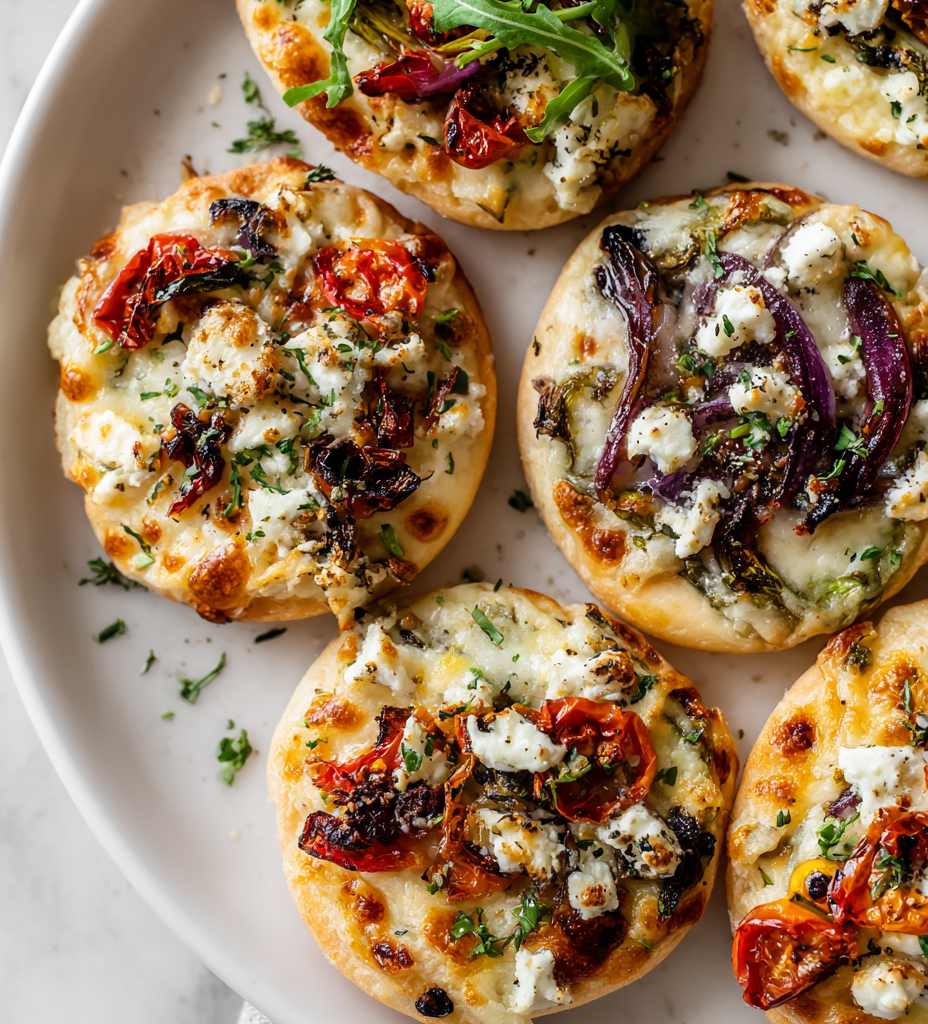
Mini Pizzas with Unconventional Toppings
Ingredients
Equipment
Method
- Activate the yeast by dissolving it in warm water and letting it sit for 5 minutes until frothy. This signals it's ready to help your dough rise.
- In a large mixing bowl, combine flour and salt. Pour in the activated yeast mixture along with olive oil, mixing until a shaggy dough forms.
- Knead the dough on a floured surface for about 8 minutes until it becomes smooth and elastic. This develops gluten for a better texture.
- Shape the dough into a ball, place it in a lightly oiled bowl, cover with a damp cloth, and let it rise in a warm spot for 1 hour until doubled in size.
- Preheat your oven to 220°C (430°F), and line a baking sheet with parchment paper. Punch down the risen dough to remove excess air.
- Divide the dough into 10-12 equal pieces. Roll each piece into a small, thin circle about 8 cm in diameter on a floured surface.
- Transfer the dough circles onto the prepared baking sheet, spacing them evenly. Lightly brush the edges with olive oil for a golden crust.
- Using a spoon, spread a thin layer of tomato sauce over each dough circle, leaving about 1 cm border around the edges.
- Sprinkle shredded mozzarella evenly over the sauce, then add slices of spicy chorizo, roasted sweet potatoes, and sprinkle chopped basil on top for flavor.
- Drizzle a little olive oil over each pizza for a shiny, golden finish, then place the baking sheet in the oven.
- Bake for about 10-12 minutes, or until the crust is crisp and golden, and the cheese is bubbling and slightly browned.
- Remove the mini pizzas from the oven, let them rest for 2 minutes, then garnish with fresh basil if desired. Serve warm and enjoy the crispy, cheesy bites.
Notes
Pro tips for perfect mini pizzas
- Bolded mini-head: Use a light hand when adding toppings to avoid soggy bases; less is more for crispness.
- Bolded mini-head: Chill your dough for at least 30 minutes before rolling; it helps prevent shrinkage and makes handling easier.
- Bolded mini-head: Preheat your oven thoroughly, ideally to 220°C (430°F); a hot oven ensures crispy, golden crusts.
- Bolded mini-head: Bake pizzas on the middle rack to promote even cooking and prevent burning on the bottom.
- Bolded mini-head: Use a pizza stone or inverted baking sheet preheated in the oven for an extra crispy crust.
- Bolded mini-head: Keep an eye on the cheese; when it’s bubbling and starting to brown, they’re ready to come out.
- Bolded mini-head: Let the mini pizzas rest for 2 minutes after baking; this helps set the cheese and makes them easier to serve.
Common mistakes and how to fix them
- OVER-TOPPED: Too many toppings cause soggy crust; use sparingly and evenly spread.
- UNDER-BAKED: Not crispy enough; bake longer or increase oven temperature slightly.
- DULL FLAVOR: Using bland sauce or cheese; boost with herbs, spices, or a splash of olive oil.
- UNEVEN COOKING: Unequal toppings or dough thickness; roll dough uniformly and distribute toppings evenly.
Quick fixes and pantry swaps
- When dough sticks, splash a little oil on your hands and work surface.
- If cheese isn’t melting well, bump up oven temperature by 10°C (20°F) for quicker melt.
- Dumped too much sauce? Blot with paper towel before adding toppings to prevent sogginess.
- Over-torched edges? Shield with foil during last 2 minutes to prevent burning.
- When toppings slide off, chill assembled mini pizzas for 10 minutes before baking for better adhesion.
Prep, store, and reheat tips
- Prepare your dough and pre-cut toppings ahead; store separately in airtight containers for up to 24 hours to keep flavors fresh and prevent sogginess.
- Assemble the mini pizzas with sauce and toppings a few hours before baking; keep refrigerated and covered to preserve the texture and aroma.
- Baked mini pizzas can be stored in the fridge for up to 2 days; reheat in a hot oven (around 180°C / 350°F) for 8-10 minutes until cheese re-melts and crust crispness returns.
- For longer storage, freeze baked or unbaked mini pizzas for up to 1 month; wrap tightly to prevent freezer burn. Reheat directly from frozen for best results, adding a few extra minutes.
- Reheating will intensify the aroma of melted cheese and toppings; the crust should regain some crispness if reheated properly, but may lose a bit of its initial freshness.
Top questions about mini pizzas
1. How do I cut mini pizzas neatly?
Use a sharp knife or pizza cutter for clean slices. It helps the toppings stay in place and makes serving easier.
2. What’s the best oven temperature for mini pizzas?
Preheat your oven to 220°C (430°F). This ensures the crust gets crispy quickly, and the cheese melts perfectly.
3. How much sauce should I use?
Use a thin layer of sauce—about 1-2 teaspoons—so the dough doesn’t turn soggy and the toppings cook evenly.
4. How long do mini pizzas take to bake?
Bake for 10-12 minutes until the cheese is bubbly and the crust is golden brown. Keep an eye on them after 10 minutes.
5. Can I use different cheese types?
Use fresh mozzarella for that gooey stretch, but shredded provolone or cheddar can add a sharper flavor.
6. How many toppings should I put on each mini pizza?
Start with a small amount of toppings—thinly sliced meats, veggies, herbs—to prevent sogginess and uneven cooking.
7. Can I make mini pizzas ahead of time?
Prepare the dough and toppings ahead of time. Keep toppings refrigerated and assemble just before baking for best texture.
8. What if my crust isn’t crispy enough?
If the crust is too pale, bake a couple of extra minutes. For burnt edges, shield with foil during the last few minutes.
9. How do I get a crispy crust?
Use a preheated baking sheet or pizza stone. It helps transfer heat quickly and crisps the bottom perfectly.
10. How should I store and reheat mini pizzas?
Store leftovers in an airtight container in the fridge for up to 2 days. Reheat in a hot oven or toaster oven until bubbly.
These mini pizzas are more than just a snack—they’re a way to bring a little chaos and creativity into the kitchen. I love how each small pie can tell a different story, whether it’s with spicy chorizo or fresh basil, and how they make feeding a crowd feel effortless.
Even when things don’t go perfectly—like a slightly soggy crust or toppings slipping off—they still taste good and remind me that the best food is the one made with a bit of mess and a lot of heart. It’s a simple recipe that keeps giving, no matter the occasion or season.

I grew up in a small town in Oregon, United States. After years of experimenting (and failing) with recipes, I realized food wasn’t just about cooking—it was about connection.