
Growing up, vegetable cutlets were always a Sunday treat, crispy on the outside and packed with soft, spiced veggies inside. But over the years, I started playing around with the recipe, adding a dash of cumin here, a hint of smoked paprika there, trying to capture that nostalgic warmth with a modern twist.
This version isn’t just about comfort — it’s about rediscovering those childhood flavors while making something a bit more exciting, perfect for sharing at a table full of friends or just for a quick, satisfying lunch. The aroma of frying spices and sizzling oil always pulls me right back to my mom’s kitchen, where love was cooked into every bite.
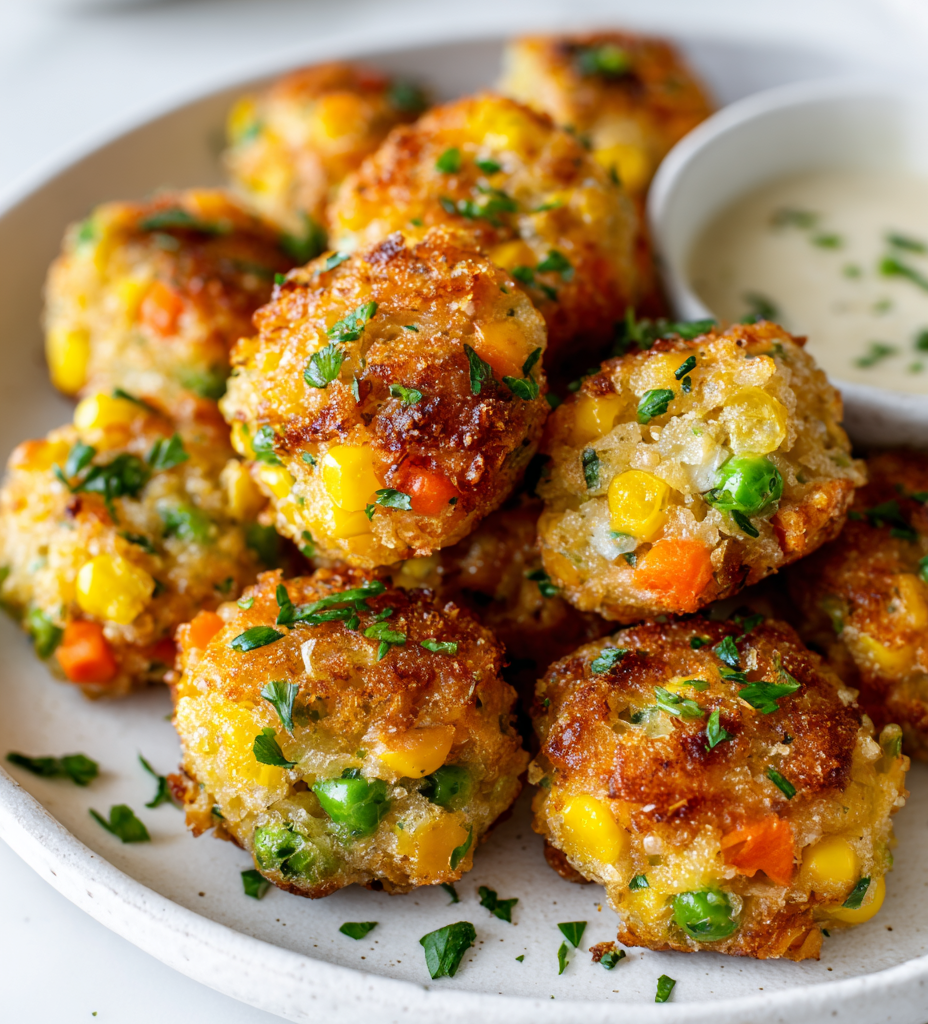
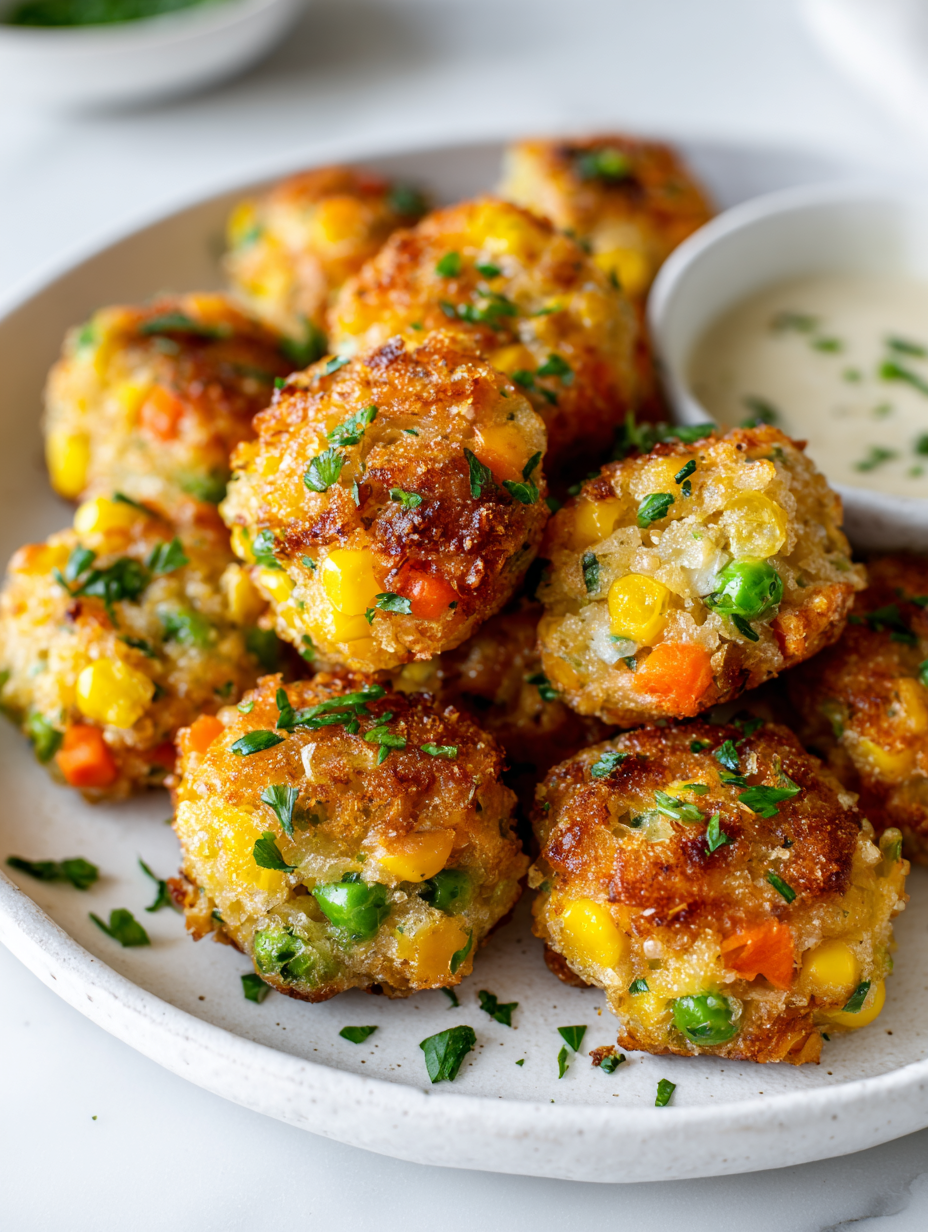
Focusing on the nostalgic comfort of childhood, this recipe reimagines vegetable cutlets with a twist of unexpected spices and a crispy, golden crust that evokes memories of family kitchens and shared stories.
Nostalgic Crispy Veggie Bites
- Making these cutlets always takes me straight back to my grandma’s kitchen, the smell of cumin and fresh veggies filling the air.
- I love how crispy and golden they get — it’s like a little bite of childhood comfort, but with a modern, spicy twist.
- There’s something oddly satisfying about flipping these over and hearing that gentle crackle of the crust setting.
- Sharing these with friends always sparks nostalgia and a bit of chaos in the kitchen, but it’s worth every messy moment.
The story behind this recipe
- This recipe for vegetable cutlets came from a rush of nostalgia one rainy afternoon. I was craving something crispy, warm, and familiar, but with a little twist to brighten up the old family favorite. It’s funny how a simple dish can carry so many memories, yet still surprise me with new flavors each time I make it.
- The inspiration struck when I found a leftover handful of grated carrots and some half-used spices in my pantry. I started mixing, tasting as I went, trying to capture that crunchy, savory bite I loved as a kid but amped up with fresh herbs and a splash of lemon juice. It became my go-to when I needed comfort and a bit of culinary adventure in one.
- heading
- story_type
Historical nuggets about vegetable cutlets
- Vegetable cutlets have roots in street food stalls across India, where quick, flavorful snacks became a household staple.
- Historically, they evolved as a vegetarian alternative to meat cutlets, making use of whatever vegetables were available locally.
- In some regions, these cutlets are linked to wartime rations, where resourcefulness turned humble ingredients into satisfying meals.
- The crispy exterior and spiced filling reflect a fusion of colonial influences and indigenous flavors, resulting in a beloved comfort food.
Key ingredients and tips
- Potatoes: I prefer starchy, fluffy potatoes for the binding; they give a soft, moist interior. Swap for sweet potatoes if you want a sweeter, denser cutlet.
- Mixed Vegetables: I use carrots, peas, and bell peppers for color and sweetness; use whatever your fridge offers, but keep the balance to avoid sogginess.
- Breadcrumbs: I opt for panko for extra crunch; regular breadcrumbs work fine but may not give as crispy a crust. Toast them lightly for more flavor.
- Spices & Herbs: I love adding garam masala and fresh cilantro; adjust according to your spice palette—more cumin if you like earthiness, less if you prefer mild.
- Binding Agents: I use a mixture of chickpea flour and a splash of water to hold everything together—if too dry, add a bit more water or oil; if too wet, dust with extra breadcrumbs.
- Oil for Frying: I use neutral oil like sunflower or canola, heated to about 180°C (350°F); watch for that shimmering surface before adding cutlets. For a healthier version, bake at 200°C (390°F) until golden.
Spotlight on key ingredients
Potatoes and Vegetables:
- Potatoes: I prefer starchy, fluffy potatoes for the binding; they give a soft, moist interior. Swap for sweet potatoes if you want a sweeter, denser cutlet.
- Mixed Vegetables: I use carrots, peas, and bell peppers for color and sweetness; use whatever your fridge offers, but keep the balance to avoid sogginess.
Breadcrumbs and Spices:
- Breadcrumbs: I opt for panko for extra crunch; regular breadcrumbs work fine but may not give as crispy a crust. Toast them lightly for more flavor.
- Spices & Herbs: I love adding garam masala and fresh cilantro; adjust according to your spice palette—more cumin if you like earthiness, less if you prefer mild.
Notes for ingredient swaps
- Dairy-Free: Swap out any dairy ingredients like milk or cheese with coconut milk or dairy-free cheese for a vegan version that still packs flavor.
- Gluten-Free: Use gluten-free breadcrumbs and chickpea flour exclusively, which will change the crunch slightly but keep it just as satisfying.
- Low-Sodium: Reduce salt and use fresh herbs and spices liberally to compensate, enhancing flavor without the salt hit.
- Fresh Herbs: Substitute dried herbs in a pinch, but expect a more muted aroma — fresh herbs really brighten the bite.
- Spice Level: Skip the chili powder or add a pinch of smoked paprika for a milder, smoky profile—less fiery but still flavorful.
- Vegetables: Feel free to mix in grated zucchini or beetroot; they add moisture and color but may slightly alter texture and moisture content.
- Oil: For a lighter option, bake instead of fry—preheat oven to 200°C (390°F), and expect a slightly less crispy crust but still tasty.
Equipment & Tools
- Grater: To grate potatoes and vegetables evenly.
- Mixing bowl: To combine ingredients thoroughly.
- Frying pan: To fry cutlets until crispy.
- Spatula: To flip and turn the cutlets safely.
- Paper towels: To drain excess oil after frying.
Step-by-step guide to vegetable cutlets
- Gather all ingredients and equipment before starting. Peel and grate 2 large potatoes (about 1.5 cups) and set aside.
- Chop 1/2 cup mixed vegetables (carrots, peas, bell peppers) into small, uniform pieces for even cooking.
- In a large mixing bowl, combine the grated potatoes, chopped vegetables, 1/4 cup chopped cilantro, 1 teaspoon garam masala, 1/2 teaspoon cumin, and 1/2 teaspoon chili powder. Mix well.
- Add 3 tablespoons chickpea flour gradually, mixing as you go, until the mixture holds together but isn’t sticky. If too wet, sprinkle in more chickpea flour.
- Divide the mixture into 8 equal portions and shape each into a flat, round patty about 1/2 inch thick. Use damp hands to prevent sticking.
- Heat about 1/2 inch of neutral oil (sunflower or canola) in a frying pan over medium heat, around 180°C (350°F). When shimmering, add cutlets carefully.
- Fry the cutlets in batches, about 3-4 minutes per side, until golden brown and crispy. Adjust heat if they brown too quickly or slow down cooking.
- Use tongs or a slotted spoon to flip and remove the cutlets. Drain excess oil on paper towels. Check that the crust is crispy and evenly golden.
- Let the cutlets rest for 2 minutes to firm up. Serve hot with chutney or yogurt, or let cool for a crispy snack.
Allow the cutlets to rest for 2 minutes after frying to set. Serve immediately for maximum crunch, or cool completely to store. For reheating, bake at 180°C (350°F) for 10 minutes until crispy again. Garnish with fresh herbs or a squeeze of lemon if desired.
How to Know It’s Done
- Color: Cutlets should be deep golden on all sides.
- Texture: Crispy exterior with a soft, cooked interior.
- Appearance: Even browning and firm shape without cracks or sogginess.
Nostalgic Crispy Veggie Bites
Ingredients
Equipment
Method
- Peel and grate the potatoes using a coarse grater, then place them in a large mixing bowl.
- Add the chopped or grated mixed vegetables, chopped cilantro, garam masala, cumin, and chili powder to the bowl with potatoes. Mix thoroughly until well combined.
- Gradually sprinkle in the chickpea flour, mixing as you go, until the mixture holds together when pressed but isn't sticky. If it feels too wet, add a little more chickpea flour.
- Divide the mixture into 8 equal portions, then shape each into a flat, round patty about half an inch thick. Keep your hands damp to prevent sticking.
- Heat about half an inch of oil in a frying pan over medium heat until shimmering and hot, around 180°C (350°F).
- Carefully place the patties into the hot oil, frying in batches. Cook for about 3-4 minutes on each side until golden brown and crispy, listening for a gentle crackle.
- Use a spatula to flip the cutlets gently, ensuring even browning. Once golden and crispy, transfer them to paper towels to drain excess oil.
- Repeat frying the remaining patties, adjusting heat as needed to prevent burning.
- Let the cutlets rest for 2 minutes to firm up the crust, then serve hot with chutney or yogurt, or let cool for a crispy snack later.
Pro tips for perfect vegetable cutlets
- Bolded Tip: Keep the oil at a steady 180°C (350°F) for even frying—use a thermometer for accuracy.
- Bolded Tip: Press the mixture firmly when shaping to prevent crumbling during frying.
- Bolded Tip: Use panko breadcrumbs for an extra crispy crust—toast lightly for added flavor before coating.
- Bolded Tip: Rest the cutlets for 2 minutes after frying to let the crust set and avoid breakage.
- Bolded Tip: Flipping the cutlets gently and only once ensures a uniform, crispy exterior.
- Bolded Tip: If the crust browns too quickly, lower the heat slightly to prevent burning while interior cooks.
- Bolded Tip: For a healthier version, bake at 200°C (390°F) until golden, about 15-20 minutes, flipping halfway.
Common mistakes and how to fix them
- FORGOT to drain excess water from vegetables → Squeeze out moisture to prevent sogginess.
- DUMPED all ingredients into the pan at once → Cook in batches for even crispiness.
- OVER-TORCHED the cutlets → Lower heat if crust darkens too quickly, keep an eye on color.
- MISSED the resting step → Rest cutlets 2 minutes to firm before serving for better texture.
Quick fixes and pantry swaps
- If oil splatters, splash with a little water to calm the crackle.
- When mixture feels too wet, dust with extra breadcrumbs to firm up.
- Splash a few drops of lemon juice if cutlets are bland or dull in flavor.
- Patch soggy cutlets by crisping in a hot oven at 200°C (390°F) for 5 minutes.
- Shield delicate cutlets with a slice of bread if they start to over-torch.
Prep, store, and reheat tips
- Prepare the vegetable mixture and shape the cutlets a day ahead; store covered in the fridge for up to 24 hours, keeping them firm and ready to fry.
- Cooked cutlets can be stored in an airtight container in the fridge for up to 2 days. Reheat in a hot oven at 180°C (350°F) for 8-10 minutes until crispy and warm, with a faint crackle when ready.
- Uncooked, shaped cutlets freeze well for up to 3 months. Layer with parchment paper in a sealed container, and fry directly from frozen, adding an extra minute per side.
- Reheating fried cutlets in the oven preserves crispiness better than microwave, which softens the crust. Expect a slight loss in crunch, but still flavorful with reheated aroma of spices.
Top questions about vegetable cutlets
1. How do I prevent soggy cutlets?
Use a coarse grater for a better texture, and squeeze out excess moisture from the vegetables so they don’t turn soggy during frying.
2. Can I bake these instead of frying?
Yes, you can bake them at 200°C (390°F) for about 15-20 minutes, flipping halfway, until golden and crispy.
3. What if my mixture is too dry or too wet?
If your mixture feels too dry, add a splash of water or a teaspoon of oil. Too wet? Mix in extra breadcrumbs gradually.
4. What vegetables are best for cutlets?
Use fresh, firm vegetables like carrots, bell peppers, and peas. For a softer interior, boil or steam tougher veggies before mixing.
5. Can I use different breadcrumbs?
Panko breadcrumbs give a crunchier crust, but regular breadcrumbs work fine. Toast them lightly for more flavor.
6. How hot should the oil be?
Ensure oil is hot enough—around 180°C (350°F)—by shimmering or using a thermometer. Fry in small batches for even crispiness.
7. Why do my cutlets fall apart?
Shape the mixture into firm patties and rest for 2 minutes after frying. This helps the crust set and prevents crumbling.
8. How do I store and reheat leftovers?
Store cooked cutlets in an airtight container in the fridge for up to 2 days. Reheat in a hot oven at 180°C (350°F) until crispy.
9. Can I customize the spices?
Add spices like cumin, garam masala, or chili powder according to your taste. Fresh herbs like cilantro brighten the flavor and aroma.
10. What if the crust burns?
If the crust burns too quickly, lower the heat slightly and cook more slowly until evenly golden and crispy.
These vegetable cutlets might seem simple, but they carry a quiet depth of flavor with each crispy bite. Making them brings back those busy kitchen mornings, filled with the smell of spices and sizzling vegetables that remind me of home.
They’re perfect for when you want a familiar comfort that’s easy to tweak — a little spice here, a splash of lemon there. No matter how often I make these, they always seem to bring a little warmth, right when I need it most.

I grew up in a small town in Oregon, United States. After years of experimenting (and failing) with recipes, I realized food wasn’t just about cooking—it was about connection.