There’s something about street food that wraps you in a warm, nostalgic hug—especially when it’s homemade. This baked paneer tikka is my go-to for those craving the smoky, charred flavors of traditional Indian stalls, but without the fuss of a tandoor. It’s a simple way to bring that vibrant, spicy aroma into your own kitchen, with less mess and more control.
I love how the oven transforms the marinated paneer into tender, slightly crispy bites that still hold onto their creamy goodness. It’s a dish that’s perfect for casual dinners or weekend snacks, and it always feels like a small celebration. Plus, it’s surprisingly forgiving—mess up the marinade, and you still end up with something deliciously satisfying.
Focusing on the nostalgic comfort of homemade Indian street food, this baked paneer tikka recipe offers a healthier, less smoky alternative that still captures the smoky, charred flavors of traditional tandoori.
The inspiration behind this dish
- This recipe came together one rainy Sunday when I was craving something smoky and cheesy but didn’t want to fire up the grill or tandoor. I started experimenting with the oven, thinking about those street vendors who somehow make everything look so effortless—yet I knew their magic had roots in tradition and a good eye for char. It’s become my go-to for cozy nights and unexpected guests, a little twist on classic street food that feels like a warm secret I’m sharing.
- I remember the first time I nailed that perfect smoky edge—those crispy edges and tender interior. It was a small victory, like capturing a fleeting moment of street food authenticity without the chaos of a proper tandoor. Now, I keep a batch marinating in the fridge for impromptu snacks, and it’s always a hit. This dish reminds me that good flavors come from simple, honest techniques—whether baked or grilled, it’s about getting that perfect caramelized glow.
- story_type
Ingredient breakdown: key components
- Paneer: I prefer firm, fresh paneer that holds up well, with a slight milky aroma. You can swap it for tofu if you want vegan, but the texture won’t be as creamy.
- Yogurt: I use thick, full-fat Greek yogurt for a rich marinade that clings nicely. Skim yogurt will work but might make the coating less luscious.
- Spices: Garam masala, turmeric, and chili powder give that smoky, warm punch. Feel free to tweak the chili for more heat or less for milder flavor.
- Lemon juice: Brightens everything and helps tenderize the paneer. Skip it if you prefer less tang, but your marinade might lack that fresh zing.
- Oil: A splash of neutral oil like vegetable or sunflower keeps the marinade smooth. Olive oil adds a subtle flavor—go for it if you like a richer note.
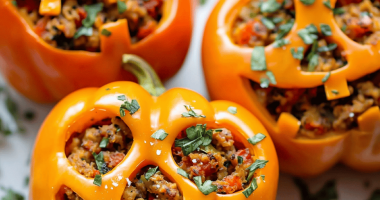
- Bell peppers (optional): I like a hint of charred sweetness from peppers; grill or roast until slightly blackened for depth. Skip if you want a simpler, more straightforward dish.
- Skewers: Wooden or metal—if using wood, soak them first to prevent burning. They make handling and serving so much easier, especially if you’re making multiple servings.
Spotlight on key ingredients
Paneer:
- I look for firm, fresh paneer with a slight milky aroma. It should hold its shape and develop a golden crust when baked.
- It’s the star—creamy, tender, and slightly chewy. If you want vegan, tofu works but won’t have the same richness.
Yogurt:
- Thick, full-fat Greek yogurt is best for a tangy, creamy marinade that sticks well. Skim works but less luscious.
- It’s the marinade’s backbone—oozy, tangy, and helps tenderize the paneer. Use fresh for the best flavor.
Notes for ingredient swaps
- Dairy-Free: Swap yogurt for coconut milk yogurt or a thick coconut cream. It adds richness, but expect a slightly sweeter, tropical note.
- Vegan Paneer: Use firm tofu pressed and marinated the same way. Tofu won’t have that creamy mouthfeel but will soak up flavors well.
- Spice Variations: Try smoked paprika instead of chili powder for a deeper smoky flavor without heat. Adjust quantity to taste.
- Oil Choices: Replace neutral oil with ghee for a richer, nutty aroma. Keep in mind, it will add a buttery depth.
- Lemon Juice: Use lime juice if you prefer a sharper, more floral acidity. It brightens the marinade with a slightly different zing.
- Bell Peppers: For a sweeter, less charred flavor, skip peppers or replace with cherry tomatoes—just watch them for burst and moisture.
- Skewers: Metal skewers are more durable and eco-friendly. Wooden skewers should be soaked at least 30 mins to prevent burning.
Equipment & Tools
- Baking sheet: Holds the skewers and ensures even baking.
- Parchment paper or silicone mat: Prevents sticking and makes cleanup easier.
- Mixing bowls: Prepare and toss the marinade and paneer.
- Skewers (wooden or metal): Thread the paneer and vegetables for easy handling.
- Brush (optional): Apply melted butter or additional marinade for extra flavor.
Step-by-step guide to baked paneer tikka
- Preheat your oven to 220°C (430°F) and line a baking sheet with parchment paper or a silicone mat. Set aside.
- Prepare skewers if using wooden ones—soak in water for at least 30 minutes to prevent burning. Metal skewers are ready to go.
- Cut the paneer into 1-inch cubes, keeping them firm but not too thick, so they cook evenly and develop a nice char.
- In a bowl, mix yogurt, spices (garam masala, turmeric, chili powder), lemon juice, and a tablespoon of oil. Whisk until smooth.
- Add the paneer cubes and optional chopped bell peppers to the marinade. Toss gently, ensuring all pieces are coated well. Let sit for at least 30 minutes, or up to 2 hours for deeper flavor.
- Thread the marinated paneer and peppers onto skewers, leaving some space between pieces for even cooking.
- Place the skewers on the prepared baking sheet. Bake in the oven for 15-20 minutes, turning halfway through. The paneer should turn golden and slightly charred at the edges.
- Check for doneness: the paneer should be crispy on the outside but still tender inside, with a smoky aroma filling the kitchen.
- Once baked, remove from oven and let rest for 2-3 minutes. Brush with a little melted butter or extra lemon if desired.
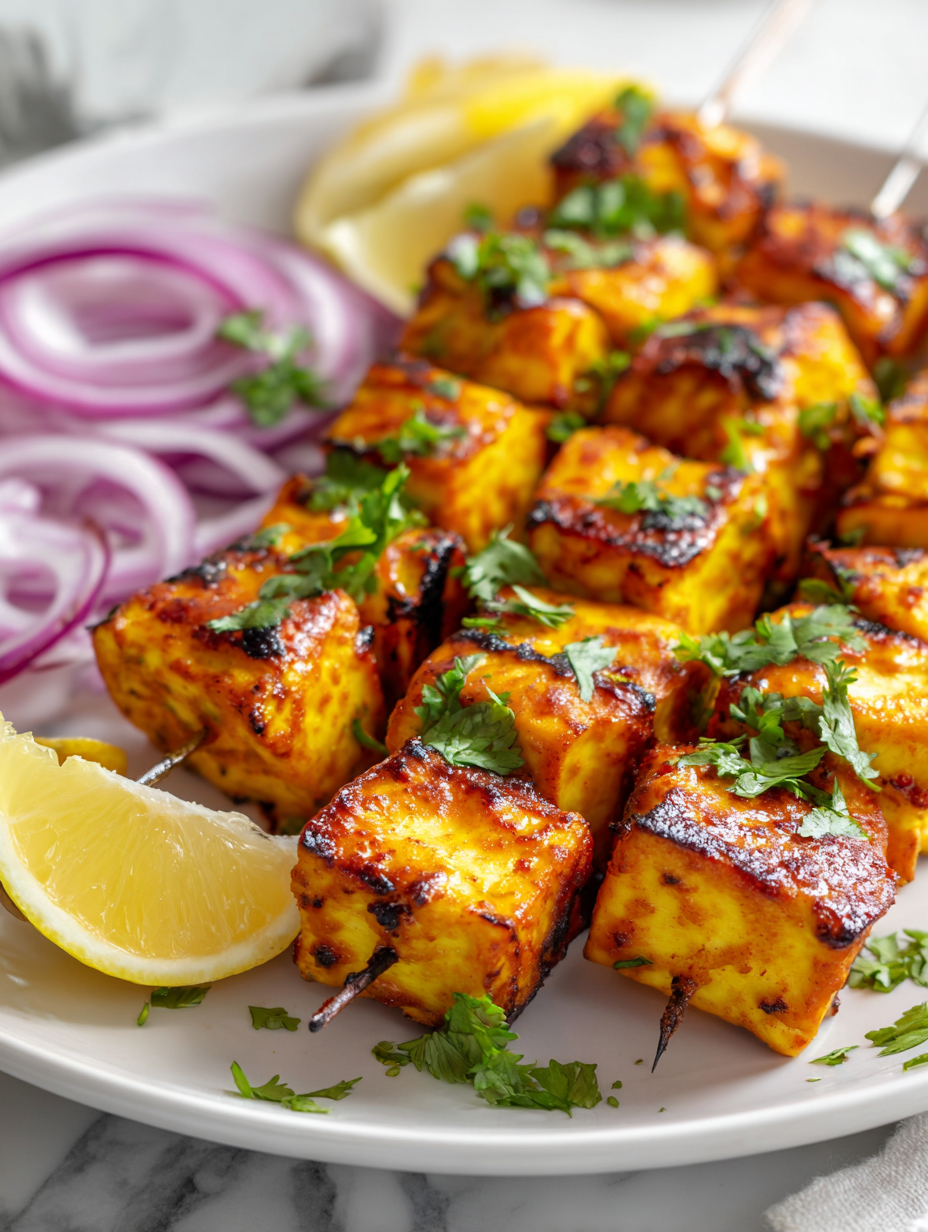
- Serve hot, garnished with fresh coriander or a squeeze of lemon. Pair with green chutney or a simple salad.
Let the baked paneer tikka rest for a couple of minutes on a plate. Garnish with chopped cilantro or a squeeze of lemon. Serve immediately with your favorite sides or dips.
How to Know It’s Done
- Color: edges are golden with charred spots, indicating proper caramelization.
- Smell: smoky and spicy aroma, not burnt or raw.
- Texture: paneer should be crispy outside, tender inside when gently pressed.
Baked Paneer Tikka
Ingredients
Equipment
Method
- Preheat your oven to 220°C (430°F) and line a baking sheet with parchment paper or a silicone mat.
- Cut the paneer into 1-inch cubes, keeping them firm but not too thick, so they bake evenly and develop a nice char.
- In a mixing bowl, whisk together the Greek yogurt, garam masala, turmeric, chili powder, lemon juice, and oil until smooth and fragrant, about 30 seconds. This will be your marinade.
- Add the paneer cubes and chopped bell pepper (if using) to the marinade. Gently toss to coat each piece thoroughly. Let sit for at least 30 minutes to soak up the flavors.
- Thread the marinated paneer and peppers onto skewers, leaving space between pieces for even cooking and browning.
- Place the skewers on the prepared baking sheet. Bake in the oven for 15-20 minutes, turning halfway through, until the edges are golden brown and slightly charred, releasing a smoky aroma.
- Check for doneness: the paneer should be crispy on the outside with a caramelized, golden hue, and the aroma should be smoky and inviting.
- Remove the skewers from the oven and let rest for 2-3 minutes. Optionally, brush with a little melted butter or extra lemon for added flavor and shine.
- Garnish with chopped cilantro or a squeeze of lemon, then serve hot with green chutney or your favorite dips for a satisfying snack or appetizer.
Pro tips for baked paneer tikka
- Use high heat—preheat your oven and baking sheet for that quick, smoky char.
- Marinate the paneer at least 30 minutes—allows flavors to penetrate and develop deeper.
- Thread the paneer loosely on skewers—leaves space for heat to circulate and char to form.
- Keep a close eye in the last 5 minutes—paneer can go from perfect to burnt quickly.
- Flip the skewers halfway—ensures even browning without overcooking one side.
- Rest the baked paneer for 2 minutes—helps juices settle and keeps it tender.
- Finish with a quick brush of butter or lemon—adds shine and a burst of fresh flavor.
Common mistakes and how to fix them
- TOO MUCH MARINADE: Excess marinade causes soggy paneer—wipe off excess before baking.
- SKIPPING SOAK: Wooden skewers burn if not soaked—soak for at least 30 minutes.
- OVERCOOKING: Burnt edges mean oven is too hot—lower to 200°C (390°F) and watch closely.
- UNDERRIPE PANEER: Soft or stale paneer won’t crisp—use fresh, firm paneer for best results.
Quick fixes and pantry swaps
- When the paneer sticks, splash a little water on the baking sheet to loosen it.
- If the marinade is too thick, open the window and patch with a dash of lemon juice for brightness.
- Overcooked edges? Shield with foil and lower oven temperature to prevent burning.
- Dumped skewers burn quickly—soak wooden ones for 30 minutes beforehand to avoid smoke and smell.
- When in doubt, swap out regular chili powder for smoked paprika for a deeper smoky aroma.
Prep, store, and reheat tips
- Marinate the paneer and vegetables up to 2 hours in advance; keep refrigerated for a smoky, infused flavor.
- Store baked paneer tikka in an airtight container for up to 2 days; reheat in the oven at 180°C (355°F) for 5-7 minutes until warmed and slightly crispy.
- Refrigerated leftovers will lose some of their charred charm and become softer; best enjoyed fresh or gently reheated.
- To reheat without losing crispness, briefly broil on high for 2-3 minutes, watching for burnt edges and smoky aroma.
- Freezing is not recommended as texture and flavor degrade; best enjoyed fresh or within 24 hours for optimal taste.
Top questions about baked paneer tikka
1. How do I choose the best paneer for baking?
Look for firm, fresh paneer with a slight milky smell. Softer or stale paneer won’t crisp well and may turn soggy.
2. Can I use regular yogurt instead of Greek yogurt?
Use thick Greek yogurt for a rich marinade—full-fat works best. Skim yogurt is okay but less creamy.
3. Do I need to soak wooden skewers?
Soak wooden skewers in water for at least 30 minutes before threading to prevent burning in the oven.
4. What oven temperature is best for baked paneer tikka?
Bake at 220°C (430°F) for 15-20 minutes until the edges are golden and slightly charred, with a smoky aroma filling the air.
5. Can I replace the peppers in the recipe?
You can swap bell peppers for cherry tomatoes or onion chunks if you prefer a different vegetable or want less char.
6. How long should I marinate the paneer?
Marinate the paneer for at least 30 minutes, or up to 2 hours for deeper flavor and better absorption.
7. How do I know when the paneer is cooked perfectly?
Look for a caramelized, golden exterior with slight charring, which indicates proper roasting and smoky flavor.
8. What if the paneer sticks during baking?
If the paneer sticks to the baking sheet, splash a little water or brush with oil to loosen it.
9. How should I reheat baked paneer tikka?
Reheat leftovers in the oven at 180°C (355°F) for 5-7 minutes for a crispy finish or briefly broil for extra char.
10. Can I adjust the spice level?
Use smoked paprika instead of chili powder for a deeper smoky flavor without extra heat, if you like a milder dish.
This baked paneer tikka brings a touch of street food magic into a more relaxed, home-cooked form. The smoky aroma, crispy edges, and tender bites make it a dish I come back to when I need comfort and a little celebration in one plate. It’s a reminder that simple, honest ingredients can create something deeply satisfying.
Whenever I serve this, I think about the joy of sharing flavors that connect us to tradition—without the fuss of a tandoor. It’s a dish that’s quick to whip up, yet full of character and nostalgia, making it perfect for any casual gathering or quiet night in.

I grew up in a small town in Oregon, United States. After years of experimenting (and failing) with recipes, I realized food wasn’t just about cooking—it was about connection.