Baking onion rings might seem like an odd twist, but honestly, it’s a lazy cook’s dream. No hot oil splatters, no greasy kitchen, just an oven doing the work while you get that crispy, savory punch of flavor. Plus, it’s a bit healthier, which makes me feel better about reaching for seconds.
I grew up dunking onion rings into thick, greasy batter and frying them till golden. But these baked ones bring back that nostalgic crunch without the chaos of deep-frying. It’s the kind of comfort food that feels a little more in control, a little more doable after a long day.
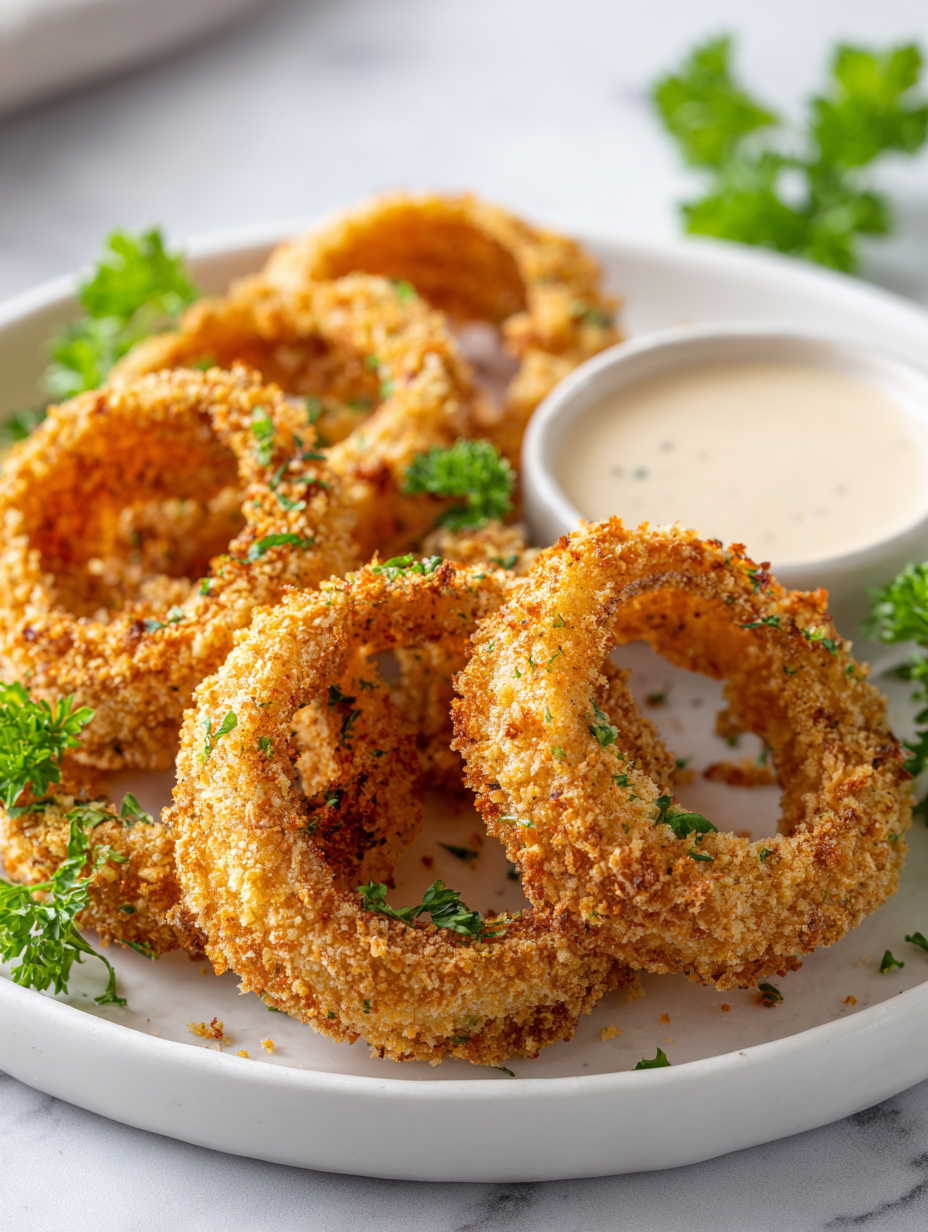
Focusing on the nostalgic comfort of baking onion rings, this recipe emphasizes healthier, oven-baked versions that keep the crispy texture without the deep-fry mess, appealing to home cooks seeking a familiar treat with less guilt.
The story behind this recipe
- This recipe came from a moment of wanting that crispy onion flavor without the usual mess. I remember standing by my oven, watching the rings turn golden and thinking, ‘Why not do this more often?’ It’s simple, honest, and somehow feels like a little rebellion against the deep-frying chaos of my past.
- Baking these onion rings felt like reclaiming comfort food—less oil, more control. I wanted something that could satisfy that craving for crunch and savory sweetness, but in a way that’s kinder to my kitchen and my waistline. Turns out, oven roasting can totally mimic that crispy magic.
- story_type
- paragraph
Key ingredients and their tweaks
- Yellow onions: I like sweet, large onions for their rich, mellow flavor and good caramelization; swap with shallots if you want a milder, more delicate taste.
- Breadcrumbs: Panko gives the crispiest exterior, but regular breadcrumbs work in a pinch—just expect a slightly softer crunch, less airy and more dense.
- Eggs: They help the coating stick, but if you’re egg-free, a thickened buttermilk or plant-based milk with a bit of flour can do the trick—less binding, more subtle flavor.
- Seasonings: Salt, pepper, and paprika add depth, but a pinch of cayenne or garlic powder can elevate the flavor—add these to taste, depending on your heat tolerance.
- Oil spray: Lightly misting the rings helps crisp them up without greasing the baking sheet; avoid heavy sprays which can make them soggy instead of crispy.
- Onion preparation: Slice evenly to ensure uniform baking, and soak in cold water briefly if you want a slightly milder onion bite—then dry thoroughly before coating.
- Baking sheet: Use a wire rack over your sheet for even air circulation, which is key to achieving that golden, uniform crunch without flipping.
Spotlight on key ingredients
Yellow onions:
- I love their sweet, mellow flavor that caramelizes beautifully. If you want a milder taste, try shallots for a subtler punch.
- They turn golden and oozy when baked, creating that irresistible contrast between crispy exterior and tender inside.
Breadcrumbs:
- Panko breadcrumbs: They give that airy, crispy crunch I crave. If you only have regular breadcrumbs, expect a denser, softer crust.
- Panko breadcrumbs: They puff up and turn a perfect golden, crackly texture, especially when sprayed lightly with oil—really elevates the snack.
Notes for ingredient swaps
- Dairy-Free: Use almond or soy milk instead of eggs. The coating might be slightly less sticky, but still tasty.
- Gluten-Free: Swap regular breadcrumbs for toasted rice crumbs or crushed cornflakes for crunch and texture.
- Vegan: Replace eggs with a thickened flaxseed or chia seed mixture—less binding, but good for binding the coating.
- Sweet Onions: Try Vidalia or Walla Walla for a milder, sweeter flavor that caramelizes beautifully.
- Smoked Paprika: Use it to add a smoky depth without actual smoking, perfect for a richer flavor profile.
- Olive Oil Spray: Substitute with avocado oil spray for a mild, fruity aroma and healthier fat profile.
- Onion Prep: Soak sliced onions in cold water briefly to tone down sharpness, then dry thoroughly for crispness.
Equipment & Tools
- Baking sheet with wire rack: Allows air circulation for even crisping.
- Mixing bowls: Separate stations for eggs and breadcrumbs.
- Whisk: Beat eggs smoothly.
- Spray bottle or cooking spray: Lightly coat rings for crunch.
- Knife and cutting board: Slice onions evenly.
Step-by-step guide to baked onion rings
- Preheat your oven to 220°C (425°F). Place a wire rack on a baking sheet to ensure even crisping. Gather your ingredients and tools before starting.
- Slice onions into rings about 1/2 inch thick. Rinse briefly in cold water if you prefer a milder flavor, then thoroughly dry to prevent sogginess.
- Set up your coating stations: In one bowl, beat 2 eggs; in another, mix 1 cup panko breadcrumbs with 1 teaspoon paprika, 1/2 teaspoon salt, and pepper.
- Dip each onion ring into the beaten eggs, letting excess drip off. Then coat evenly in the breadcrumb mixture, pressing lightly to adhere.
- Arrange coated onion rings on the wire rack, making sure they aren’t touching. Lightly spray the tops with cooking spray to promote crispness.
- Bake in the preheated oven for 15-20 minutes. Halfway through, flip the rings and spray again if needed. Look for a golden-brown color and crispy edges.
- When they turn a deep golden and emit a crackling sound, check for doneness. The coating should be crisp and the onions tender.
- Remove from oven. Let rest for 2 minutes to firm up. Serve immediately with your favorite dipping sauce, still warm and crunchy.
Let the onion rings rest on the rack for 2 minutes. Serve hot with dip. For extra crispness, serve immediately as they tend to soften over time.
How to Know It’s Done
- Color: Rings should be uniformly golden and crispy.
- Texture: Coating feels firm and crackles when tapped.
- Appearance: Onion rings are evenly browned without burnt spots.
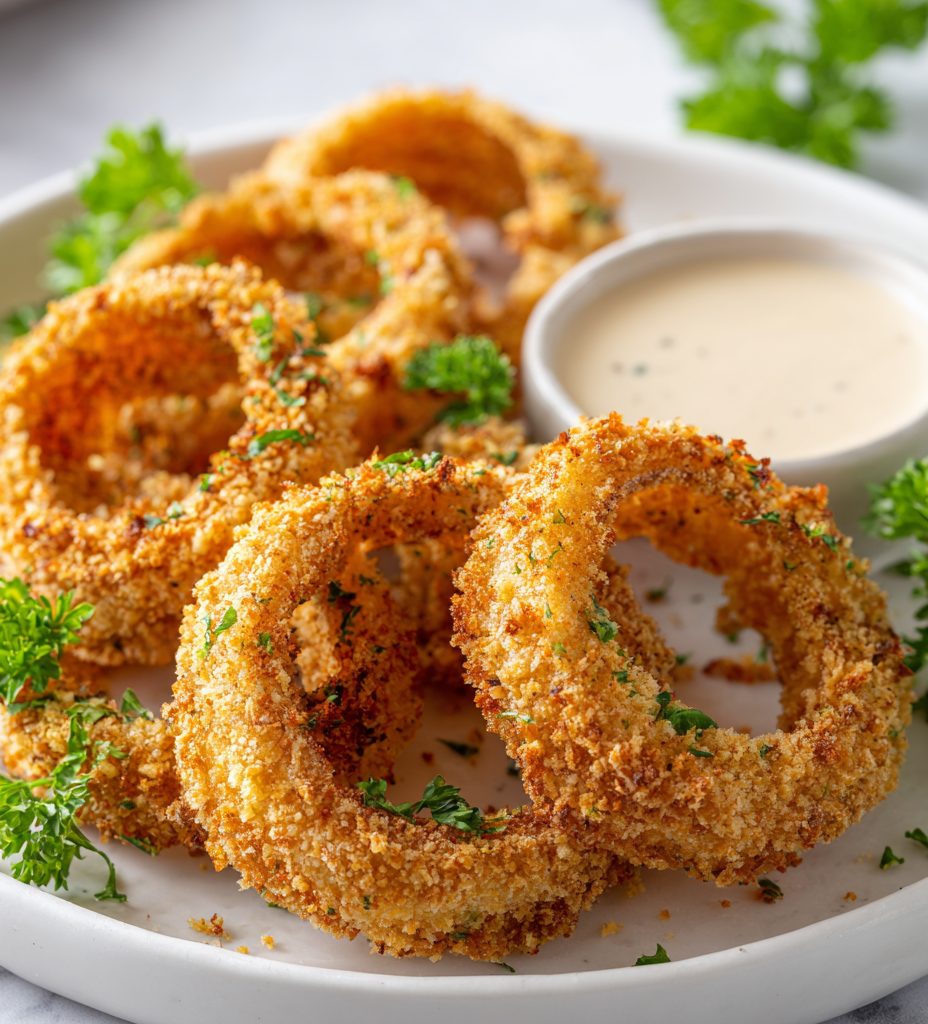
Baked Onion Rings
Ingredients
Equipment
Method
- Peel and slice the onions into rings about half an inch thick. Rinse briefly in cold water if you prefer a milder flavor, then dry thoroughly with a clean towel.
- Set up your coating stations: in one bowl, whisk the eggs; in another, combine panko breadcrumbs with paprika, salt, and pepper.
- Dip each onion ring into the beaten eggs, allowing any excess to drip off, then coat it evenly in the seasoned breadcrumb mixture, pressing gently to adhere.
- Place the coated onion rings on a wire rack set over a baking sheet, making sure they are spaced apart to allow air circulation for even crisping.
- Lightly spray the tops of the onion rings with oil to help them crisp up in the oven.
- Bake in a preheated oven at 220°C (425°F) for 15 to 20 minutes, flipping the rings halfway through and spraying again if needed, until they are golden and crackling.
- Check for doneness: the coating should be a deep golden color and feel crispy to the touch, with a crackling sound when tapped.
- Remove from the oven and let rest on the rack for a couple of minutes to firm up and retain their crunch.
- Serve immediately with your favorite dipping sauce, enjoying the warm, crispy, sweet onion flavor.
Tips for perfect baked onion rings
- Pre-chill your breadcrumbs: Keep them in the fridge before coating for extra crunch and better adherence.
- Use room temperature onions: They caramelize more evenly, adding sweetness and preventing soggy rings.
- Spray generously but evenly: A light mist helps the coating crisp up without becoming greasy or clumping.
- Bake on a wire rack: Elevate the rings for even heat circulation, avoiding soggy bottoms and ensuring uniform crispness.
- Watch the color closely: Remove when golden and crackling—over-baking turns bitterness and burns the coating.
- Rest briefly after baking: Let the rings sit on the rack for 2 minutes to firm up and retain crunch before serving.
- Flip halfway through: Turn the rings at the 10-minute mark for evenly browned, crispy coating on all sides.
Common mistakes and how to fix them
- FORGOT to pat onion rings dry before coating — result: soggy crust. Fix: Ensure thorough drying.
- DUMPED too much oil spray — leads to greasy rings. Fix: Light, even spritz for crispness.
- OVER-TORCHED the coating — turns bitter. Fix: Remove when golden and crackling, not burnt.
- MISSED the resting step — rings may soften. Fix: Rest on rack for 2 minutes before serving.
Quick fixes and pantry swaps
- When onion rings are soggy, splash lightly with vinegar to revive crispness.
- If coating cracks during baking, patch with a quick spray of oil and bake longer.
- Dumped too much oil? Patch with a paper towel and reduce spray next time.
- Over-torched coating? Rescue by brushing with lemon juice to cut bitterness.
- Splash cold water on burnt spots to cool and prevent further charring.
Prep, store, and reheat tips
- Prepare the onion slices and coating mixture a day in advance; store separately in airtight containers in the fridge. The onions stay crisp, and flavors meld overnight.
- Once coated, onion rings can be kept in the fridge for up to 24 hours. Keep them on a wire rack in a covered dish to prevent sogginess while maintaining crispness.
- Baked onion rings are best enjoyed within 2 hours of baking for optimal crunch. After that, they tend to soften and lose their crisp exterior.
- Reheat in a 180°C (350°F) oven for 5-7 minutes, on a wire rack if possible. Look for a crackling sound and golden color to confirm they’re reheated perfectly.
- Avoid microwaving, as this makes the coating soggy and chewy. The oven keeps that crispy texture intact better.
Top questions about baked onion rings
1. Can I soak the onions before baking?
Use cold water to soak the sliced onions for a milder flavor and less sharpness, then dry thoroughly to keep them crispy.
2. Do I need oil spray for baking?
Yes, a light spray of oil helps achieve that crispy exterior without greasing the baking sheet too much.
3. How do I know when the onion rings are done?
Bake until the coating is golden brown and crackling, about 15-20 minutes, flipping halfway for even crispness.
4. Can I substitute breadcrumbs?
Using panko breadcrumbs creates a light, airy crunch, but regular breadcrumbs can work for a softer crust.
5. Is this recipe vegan-friendly?
To make vegan rings, replace eggs with a flaxseed or chia seed mixture, which binds the coating without eggs.
6. How should I store baked onion rings?
Store leftovers in an airtight container in the fridge for up to a day. Reheat in the oven to regain crispiness.
7. What if my coating isn’t crispy?
If the coating cracks or falls off, lightly spray with oil and bake a few extra minutes to re-crisp.
8. Which onions are best for baking?
Choose large, sweet onions like Vidalia for a milder, caramelized flavor that complements the crispy coating.
9. How do I reheat without losing crunch?
Avoid microwaving, as it makes the coating soggy. Instead, reheat in a hot oven for best texture.
10. What visual cues tell me they’re ready?
Look for a deep golden color and a crackling sound when baked; these signs show they’re perfectly crispy.
Baked onion rings might not be your first thought when craving crispy snacks, but they deliver that satisfying crunch with less fuss and guilt. Plus, the smell of caramelized onion and toasted breadcrumbs filling the kitchen is pure comfort. It’s a simple, honest treat that feels just right for any day of the week.
Once you get the hang of baking these, you’ll wonder why you ever fried them. They’re great for sharing, easy to customize with spices, and hold up well enough to make in advance. Sometimes, the best comfort food is the simplest, and these rings prove that.

I grew up in a small town in Oregon, United States. After years of experimenting (and failing) with recipes, I realized food wasn’t just about cooking—it was about connection.