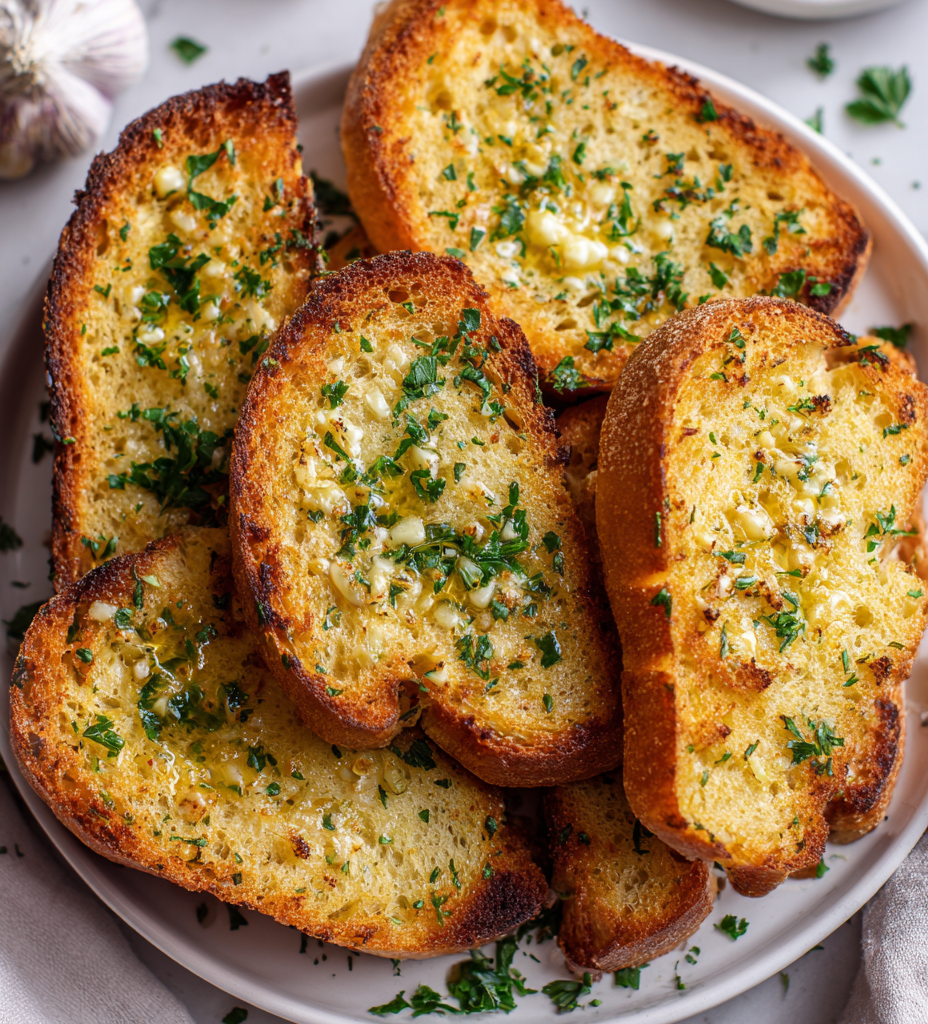
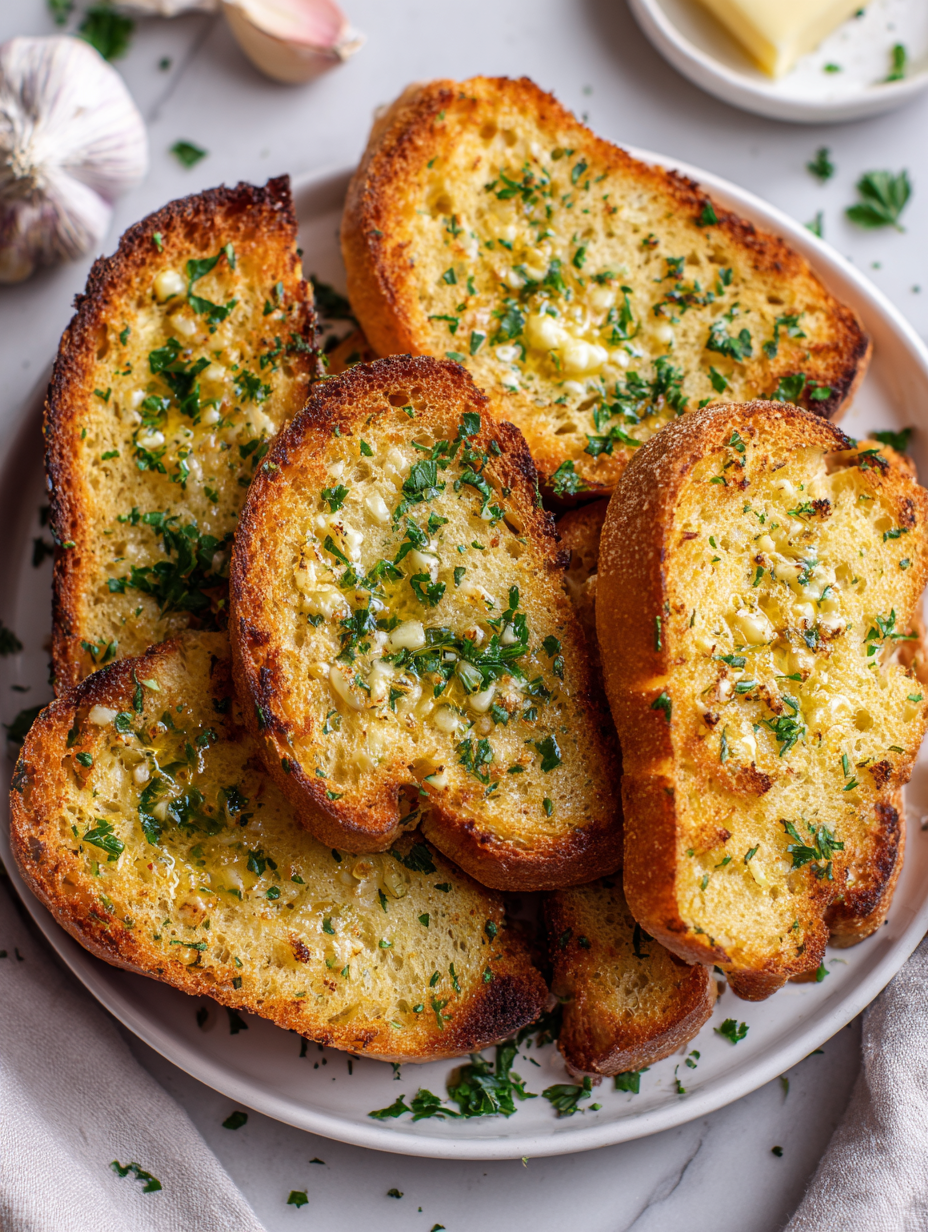
Making garlic bread from scratch is one of those small, mindful acts that feels like a warm hug. It’s about the ritual—the way the garlic turns fragrant and golden, the smell of butter melting into crusty bread, filling the kitchen with a cozy, savory aroma that makes everyone stop and breathe it in. There’s a quiet satisfaction in crafting something so simple yet so undeniably comforting, especially when baked to that perfect, slightly crispy edge. It’s not just about eating it; it’s about the process, the smells, and that slow, fragrant build-up of flavor.
In my house, garlic bread is more than a side dish; it’s a moment. A pause between the chaos of dinner prep and the first bites of a hearty meal. Baking it from scratch means I can control the butter and garlic, making sure every slice is lush, fragrant, and just a little bit indulgent. It’s the kind of thing that turns an ordinary meal into a small celebration, even if it’s just a weeknight. And honestly, nothing beats the smell that wafts through the house as it bakes—garlic, butter, and toasted bread coming together in a warm, irresistible symphony.
Focusing on the ritual of making garlic bread from scratch, highlighting the sensory experience of smelling the garlic and baking aroma, and emphasizing the comfort found in creating something warm and fragrant with simple ingredients.
The story behind this recipe
- This garlic bread recipe came from a moment of needing comfort after a long day. I didn’t have anything fancy, just some good bread and garlic that I couldn’t resist. Baking it turned into a little ritual that made everything else melt away—an aroma that wrapped around me like a warm blanket. It’s funny how something so simple can bring back so many quiet, cozy memories of family dinners and lazy weekend afternoons.
- One evening, I was experimenting with how much garlic I really needed—more than usual, of course. The smell of roasting garlic bubbling up with butter became a kind of instant mood lifter. That’s when I realized that the real magic was in the process—the slow melting, the fragrant sizzle, the crispy edges that give that perfect bite. It’s become my go-to for turning a simple meal into a small, fragrant celebration.
- heading
- story_type
Key ingredients and their secrets
- Good quality unsalted butter: I prefer butter that’s rich and creamy—it melts smoothly, giving the bread a luscious, velvety texture. Skip margarine for a true flavor boost.
- Fresh garlic: The aroma of freshly minced garlic is unbeatable—more pungent and vibrant than pre-minced. Use a generous amount for that punchy, fragrant hit.
- Crusty artisan bread: I love a rustic sourdough or a baguette with a thick crust. It holds up well and develops a beautiful, golden crunch when baked.
- Olive oil (optional): A drizzle adds a subtle fruity note and helps the garlic spread evenly. If you prefer a richer taste, use good quality extra virgin olive oil.
- Parsley (for garnish): Bright green and fresh, it adds a pop of color and a slight herbal contrast. Skip if you want a more intense garlic experience.
- Salt: I use sea salt to enhance all the flavors—just a pinch makes a difference. Be cautious not to oversalt the butter mixture.
- Black pepper (optional): A dash adds a faint heat and depth. Freshly cracked pepper makes it more aromatic and lively.
Spotlight on key ingredients
Good quality unsalted butter:
- I prefer butter that’s rich and creamy—it melts smoothly, giving the bread a luscious, velvety texture. Skip margarine for a true flavor boost.
- Fresh garlic: The aroma of freshly minced garlic is unbeatable—more pungent and vibrant than pre-minced. Use a generous amount for that punchy, fragrant hit.
- Crusty artisan bread: I love a rustic sourdough or a baguette with a thick crust. It holds up well and develops a beautiful, golden crunch when baked.
Fresh garlic:
- The aroma of freshly minced garlic is unbeatable—more pungent and vibrant than pre-minced. Use a generous amount for that punchy, fragrant hit.
- Crusty artisan bread: I love a rustic sourdough or a baguette with a thick crust. It holds up well and develops a beautiful, golden crunch when baked.
Notes for ingredient swaps
- Dairy-Free: Swap butter for coconut oil or a vegan margarine. Expect a slightly different richness and a hint of coconut aroma.
- Gluten-Free: Use a sturdy gluten-free bread or bake your own with a gluten-free flour blend. Texture might be a bit denser, but still delicious.
- Garlic Variations: Roasted garlic offers a mellow, sweet flavor compared to raw garlic’s punch. Use it for a softer garlic note.
- Herb Alternatives: Fresh basil or thyme can replace parsley for different herbal brightness. Adjust quantity to taste, as some herbs are more pungent.
- Oil Choices: Olive oil adds fruitiness, but avocado oil is a neutral option with a clean, mild flavor. Use sparingly for a subtler aroma.
- Salt Options: Sea salt or Himalayan pink salt enhances flavor differently. Use in small amounts, as they can be more potent than regular salt.
- Bread Types: Baguette, sourdough, or ciabatta all work. Thinner slices get crispier, thicker slices stay chewy in the middle.
Equipment & Tools
- Baking sheet: To hold the bread for baking and ensure even heat transfer.
- Sharp knife or bread slicer: To cut the loaf into even slices without crushing the bread.
- Spatula or butter knife: To spread the garlic butter generously between slices.
- Mixing bowl: To combine and soften the garlic butter ingredients.
- Aluminum foil (optional): To tent the bread if it starts to brown too quickly or to keep warmth.
Step-by-step guide to baked garlic bread
- Preheat your oven to 190°C (375°F). Use a baking sheet or an oven-safe dish. Get it hot so the bread crisps up nicely.
- Slice the bread: Cut your loaf into 1-inch slices, but don’t cut all the way through—leave a little base intact. This helps the garlic butter seep in and keeps it all together.
- Make garlic butter: Mince 4-5 cloves of garlic. Mix with 1/2 cup softened unsalted butter, a pinch of salt, and chopped parsley if using. Mash it until smooth and fragrant; it should smell like a garlic cloud.
- Spread generously: Use a butter knife or spatula to spread the garlic butter between the slices and over the top. Be generous—this is the good stuff.
- Bake: Place the bread on your preheated baking sheet. Bake for 15-20 minutes. Check for golden edges and bubbling butter. If the edges aren’t crispy enough, broil for 1-2 minutes—watch like a hawk to avoid burning.
- Final touch: Once out, sprinkle with a little extra parsley or flaky sea salt if desired. Let it sit for 2-3 minutes to settle; the butter will be hot and luscious.
- Serve warm: Pull apart the slices and serve immediately. The aroma should be inviting, the garlic fragrant, and the bread crispy on the edges. If it cools, reheat at 180°C (350°F) for 5 minutes until warmed through.
Allow the baked garlic bread to rest for 2-3 minutes after baking. Then, serve directly from the oven or transfer to a platter. For extra flavor, sprinkle with fresh herbs or a pinch of flaky sea salt just before serving. Slice and enjoy while warm, with the garlic aroma lingering in the air.
How to Know It’s Done
- Edges are golden and crispy, with bubbling garlic butter visible.
- Aromatic garlic smell fills the kitchen, not burnt but fragrant.
- Bread feels firm but tender when gently pressed, not soggy or overly hard.
Homemade Garlic Bread
Ingredients
Equipment
Method
- Start by mixing the softened butter with the finely minced garlic, a pinch of sea salt, and chopped parsley in a bowl until well combined and fragrant. The mixture should be smooth and aromatic, with the garlic evenly distributed.
- Using a spatula or butter knife, generously spread the garlic butter between each slice of bread, making sure to coat every surface and push some of the mixture into the cuts for maximum flavor.
- Arrange the coated bread slices on a baking sheet in a single layer, with slices slightly fanned out so they can crisp evenly.
- Preheat your oven to 190°C (375°F). Once ready, place the baking sheet in the oven and bake for 15-20 minutes, until the edges are golden and bubbling with butter.
- For an extra crispy top, switch to broil for 1-2 minutes, watching closely to prevent burning, until the edges are beautifully browned.
- Remove the garlic bread from the oven and let it sit for 2-3 minutes. Garnish with additional chopped parsley if desired, then serve while warm and fragrant.
Tips & Tricks for Perfect Garlic Bread
- Bolded Mini-Head: Use room temperature butter to spread easily and melt quickly, creating a silky, even coating.
- Bolded Mini-Head: Mince garlic finely for maximum surface contact, releasing more aroma and flavor during baking.
- Bolded Mini-Head: Wrap the bread loosely with foil if edges brown too fast; this traps heat and keeps the middle soft.
- Bolded Mini-Head: For an extra crispy top, broil for the last 1-2 minutes, but stay close to avoid burning.
- Bolded Mini-Head: Rest the baked garlic bread for 2-3 minutes post-baking; this helps butter settle and flavors meld.
- Bolded Mini-Head: Use a sharp serrated knife to slice hot garlic bread; it prevents squishing and keeps slices neat.
- Bolded Mini-Head: Add a sprinkle of flaky sea salt right after baking for a burst of extra flavor and texture.
Common mistakes and how to fix them
- FORGOT to preheat oven → Always preheat for even baking and crispy edges.
- DUMPED garlic directly on bread → Mince garlic finely for even flavor distribution.
- OVER-TORCHED bread → Reduce broiling time; keep a close eye to prevent burning.
- MISSED to leave bread slightly connected → Keep slices attached at the base for easier spreading.
Quick Fixes and Pantry Swaps
- When garlic burns, splash a little water into the oven to cool and stop the burnt smell.
- If bread is soggy, increase oven temperature slightly or broil for a quick crisp.
- Dumped garlic in one spot? Patch with more butter and spread evenly for balanced flavor.
- Over-torched edges? Shield with foil and lower oven heat, then continue baking.
- When bread sticks to the pan, use a thin spatula to gently lift without tearing.
Prep, store, and reheat tips
- Prepare the garlic butter and slice the bread a day in advance. Keep the butter covered in the fridge—it will be firm but easy to spread when softened.
- Store the pre-sliced bread tightly wrapped in plastic wrap or in an airtight container. It can stay in the fridge for up to 24 hours without losing freshness.
- Refrigerated garlic bread will develop a stronger garlic aroma overnight—perfect for those who love a punch of flavor. Reheat in the oven for best texture.
- To reheat, wrap the garlic bread in foil and warm at 180°C (350°F) for 5-7 minutes. The bread should be warm, fragrant, and slightly crispy on the edges.
- Leftovers will keep in the fridge for up to 2 days. Reheat until bubbling and golden, and the smell of garlic is inviting again.
Top questions about baked garlic bread
1. Can I use pre-minced garlic?
Use fresh garlic for a punchier, more vibrant flavor. Pre-minced forms are milder and less pungent.
2. How long and at what temperature should I bake it?
Bake at 190°C (375°F) for about 15-20 minutes until edges are golden and bubbly.
3. How do I reheat leftovers?
Wrap in foil and reheat at 180°C (350°F) for 5-7 minutes for a warm, crispy result.
4. What kind of bread works best?
Use a good-quality rustic bread or baguette; softer bread may turn soggy or lose crunch.
5. Can I add other herbs or toppings?
Add fresh herbs like parsley or thyme after baking for a burst of color and aroma.
6. Can I make this vegan?
For a vegan version, substitute butter with olive oil or vegan margarine. Expect a slightly different texture.
7. How do I get a crispier crust?
Yes, broil for an extra minute or two for a crispy top, but watch closely to prevent burning.
8. Should the butter be cold or softened?
Use room temperature butter for easy spreading and even melting during baking.
9. How should I slice the bread?
Slice the bread but leave the base intact. It helps the slices stay together and soak up the garlic butter.
10. Can I prepare this ahead?
Make the garlic butter a day ahead and store in the fridge; it flavors the bread even more overnight.
Baked garlic bread is more than just a side—it’s a small ritual that fills the house with warmth and aroma. Sometimes, it’s the simple act of mixing butter and garlic that turns an ordinary meal into a cozy, memorable moment.
Whether you’re making it for a quick weeknight dinner or a casual gathering, the smell alone makes it worth the effort. It’s honest, imperfect, and deeply satisfying—exactly how comfort food should be.

I grew up in a small town in Oregon, United States. After years of experimenting (and failing) with recipes, I realized food wasn’t just about cooking—it was about connection.