Baking breaded shrimp might seem simple, but it’s a little trick that changes everything. No splatter, no messy oil, just a straightforward way to get that crispy coating without the fuss of frying. It’s perfect for when you want something crunchy and satisfying but don’t want to deal with deep-frying cleanup.
I’ve always loved fried shrimp, but after a few kitchen mishaps and greasy stovetop messes, I started experimenting with baking instead. Turns out, with the right breadcrumb coating and oven temp, you get that same satisfying crunch—just lighter and a bit more controlled. It’s a game-changer for busy weeknights or when you’re feeding a crowd and want less oil in the mix.
Focusing on the overlooked technique of baking breaded shrimp to achieve a crispy exterior without deep frying, turning a typically fried dish into a lighter, oven-friendly version that still delivers that satisfying crunch.
The story behind this recipe
- This recipe came about on a lazy Sunday, when I was craving crispy shrimp but wanted to skip the greasy mess. I remembered my grandmother’s old oven technique—baking instead of frying—and wondered if I could get that crunch without all the oil. Turns out, a good breadcrumb coating and a hot oven do the trick, and I’ve been hooked ever since.
- It’s one of those dishes I turn to when I want something familiar but a little lighter. The smell of toasted breadcrumbs and the sizzle of shrimp baking fills my kitchen with comfort. Honestly, it’s become my go-to for quick dinners or when I have friends popping in last minute, craving something satisfying but not heavy.
- heading: ‘The story behind this recipe’
Key Ingredients Breakdown
- Shrimp: I prefer peeling and deveining mine for that clean bite, but if you’re pressed, frozen peeled works fine. The fresh ones feel juicier, especially when they turn rosy in the oven’s heat.
- Breadcrumbs: I use panko for that extra airy crunch, but seasoned breadcrumbs give a flavor boost without extra effort. Toast them lightly before coating for a nutty aroma that’s irresistible.
- Egg wash: A simple beaten egg with a splash of water helps the coating stick. If it feels too thick, dilute with a teaspoon of milk—your shrimp will get a more tender crumb.
- Spices: I love adding smoked paprika and a pinch of cayenne for smoky heat. Adjust to your spice tolerance—sometimes I go heavy on the paprika for color and flavor that’s smoky and vibrant.
- Oil spray: I use a light mist of olive oil or avocado spray over the coated shrimp before baking—this helps the breadcrumbs crisp up evenly and gives that golden shimmer. Don’t skimp on it; it’s the secret to that crunchy exterior.
- Lemon: A squeeze of fresh lemon juice after baking really brightens the flavor. It’s the finishing touch that lifts all that toasted, smoky goodness—don’t skip it.
- Optional herbs: Fresh parsley or dill added after baking lend a fresh, green note. If you’re out, a sprinkle of dried herbs works, but fresh feels more lively and fragrant.
Spotlight on key ingredients
Shrimp:
- I prefer peeling and deveining mine for that clean bite, but if you’re pressed, frozen peeled works fine. The fresh ones feel juicier, especially when they turn rosy in the oven’s heat.
- Breadcrumbs: I use panko for that extra airy crunch, but seasoned breadcrumbs give a flavor boost without extra effort. Toast them lightly before coating for a nutty aroma that’s irresistible.
Breadcrumbs:
- I use panko for that extra airy crunch, but seasoned breadcrumbs give a flavor boost without extra effort. Toast them lightly before coating for a nutty aroma that’s irresistible.
- Egg wash: A simple beaten egg with a splash of water helps the coating stick. If it feels too thick, dilute with a teaspoon of milk—your shrimp will get a more tender crumb.
Notes for ingredient swaps
- Dairy-Free: Swap eggs for aquafaba or a soy-based binder. It won’t bind as tightly but still helps breadcrumbs adhere.
- Gluten-Free: Use crushed rice crackers or gluten-free panko. Keeps that crispy crunch without wheat, but may be slightly less airy.
- Low-Sodium: Choose unsalted breadcrumbs and skip added salt in the coating. Flavor will be more reliant on spices and lemon.
- Spicy Heat: Replace cayenne with chipotle powder for smoky heat or omit entirely for milder shrimp.
- Herb Boost: Fresh thyme or basil can replace parsley after baking. Adds a different green aroma, more fragrant and lively.
- Oil Spray: Use a light mist of coconut oil for a slightly sweeter flavor. Remember, it might brown faster than olive or avocado.
- Breadcrumbs: Toast plain breadcrumbs before coating for a richer, nuttier aroma—skip if you prefer lighter texture.
Equipment & Tools
- Baking sheet: To hold the shrimp while baking evenly.
- Parchment paper or silicone mat: Prevent sticking and make cleanup easier.
- Three shallow dishes: For breading setup: egg wash, seasoned breadcrumbs, and ready-to-bake shrimp.
- Tongs: To handle the shrimp without breaking the coating.
- Kitchen spray (olive or avocado oil): To lightly mist the coated shrimp for crispiness.
Step-by-step guide to baked shrimp
- Preheat your oven to 220°C (425°F). Line a baking sheet with parchment paper or a silicone mat to prevent sticking.
- Prepare the shrimp: peel and devein if not already done. Rinse and pat dry thoroughly. Size should be about 16-20 count per pound for even cooking.
- Set up your breading station: in one shallow dish, beat 1 egg with a splash of water; in another, combine 1 cup panko breadcrumbs, 1 teaspoon smoked paprika, ½ teaspoon cayenne, salt, and pepper.
- Coat the shrimp: dip each shrimp in the egg wash, allowing excess to drip off. Then dredge in the seasoned breadcrumbs, pressing lightly to adhere. Place coated shrimp on the prepared baking sheet.
- Spray the coated shrimp lightly with olive oil or avocado spray—this helps the breadcrumbs turn golden and crispy. Don’t overspray; a light mist is enough.
- Bake in the preheated oven for 8-10 minutes. Check for a golden-brown color and a slight crispy crust. The shrimp should turn pink and opaque.
- Halfway through, flip the shrimp with tongs for even browning. If some shrimp are browning faster, remove them first to prevent overcooking.
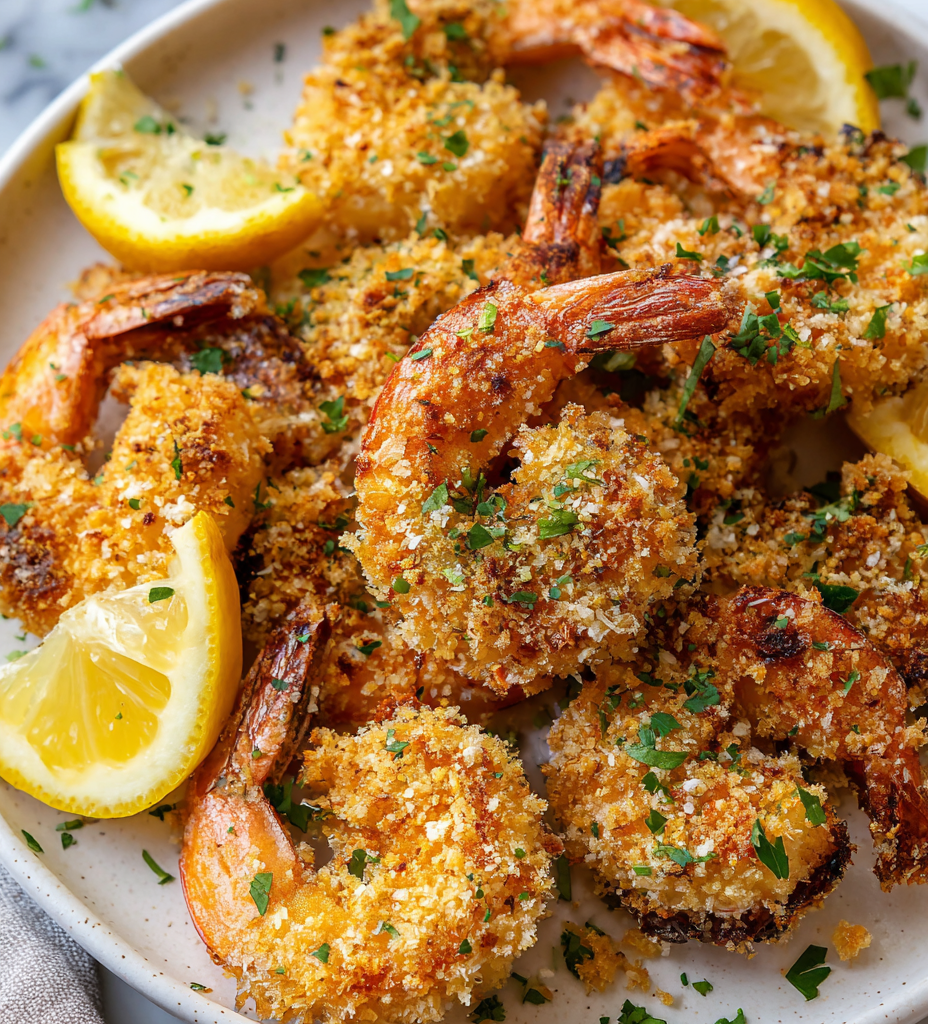
- Once baked, remove from oven and let rest for 2 minutes. Squeeze fresh lemon over the top for brightness. Garnish with chopped parsley if desired.
Let the shrimp rest for 2 minutes after baking. Serve immediately with lemon wedges and your favorite dipping sauce or salad.
How to Know It’s Done
- Shrimp turn opaque and pink with a firm texture.
- Breadcrumbs are golden and crispy without burning.
- Shrimp jiggle slightly but hold their shape when gently pressed.
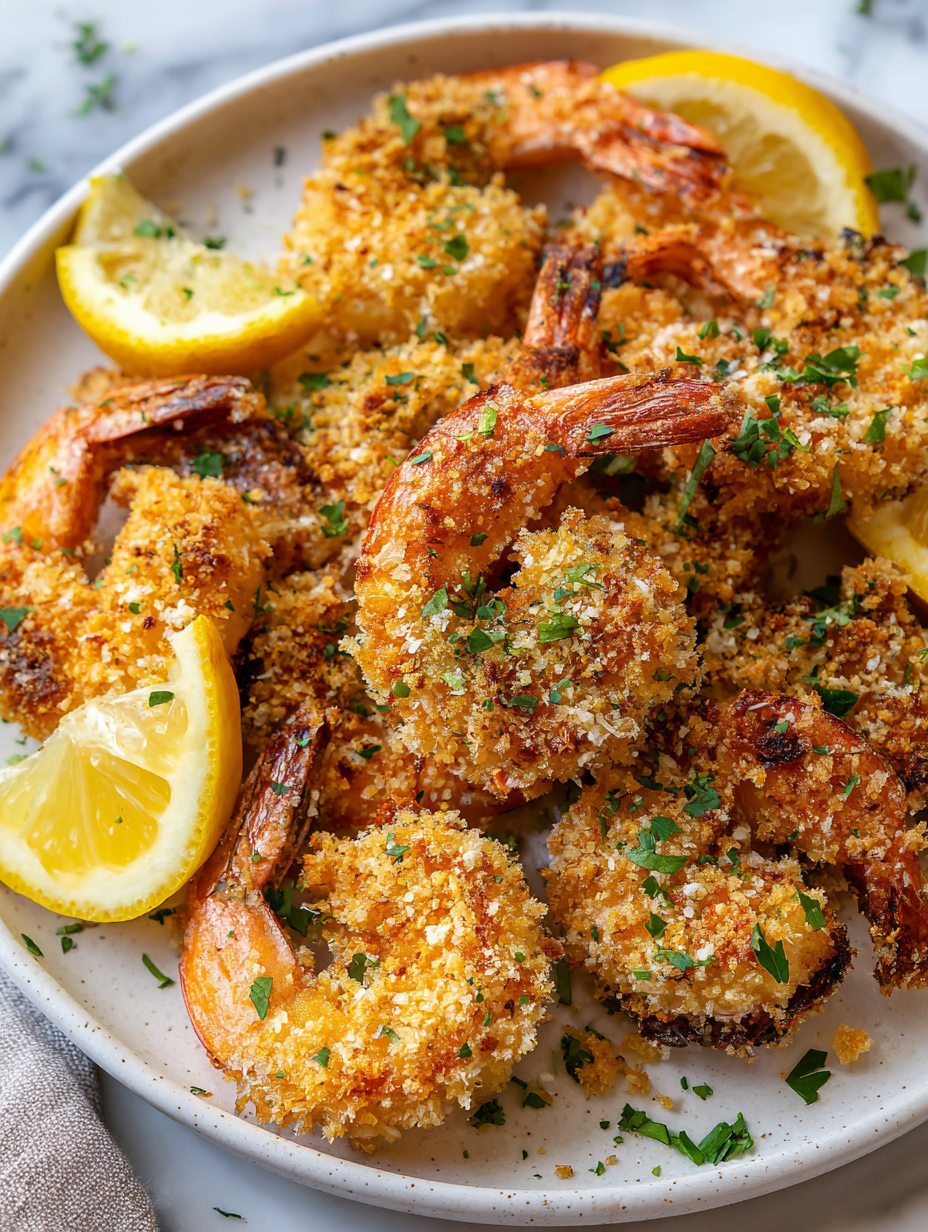
Baked Crispy Shrimp
Ingredients
Equipment
Method
- Preheat your oven to 220°C (425°F). Line a baking sheet with parchment paper or a silicone mat to prevent sticking.
- Peel and devein the shrimp if not already done, then rinse and pat them very dry with paper towels. Dry shrimp help the coating stick better.
- Set up your breading station: in one shallow dish, beat the egg with water until smooth; in another, combine the panko breadcrumbs, smoked paprika, cayenne, salt, and pepper.
- Dip each shrimp into the egg wash, letting the excess drip off, then dredge in the seasoned breadcrumbs, pressing lightly to ensure they stick well.
- Arrange the coated shrimp on the prepared baking sheet in a single layer, leaving space between each piece.
- Lightly spray the coated shrimp all over with oil spray. This helps the breadcrumbs turn golden and crispy during baking.
- Bake in the preheated oven for 8-10 minutes, until the shrimp are pink, opaque, and the breadcrumbs are golden brown. Flip the shrimp halfway through to promote even browning.
- Once done, remove from the oven and let rest for a couple of minutes. Squeeze fresh lemon juice over the shrimp for a bright, tangy finish.
- Garnish with chopped parsley if desired, then serve immediately with lemon wedges or your favorite dipping sauce.
Pro tips for crispy baked shrimp
- Use panko for maximum crunch and lightness.
- Spray the shrimp lightly with oil before baking to mimic fried crispness.
- Turn the shrimp halfway through baking for even color and texture.
- Keep an eye on the breadcrumbs; remove from oven once golden, not burnt.
- For extra flavor, toast the breadcrumb mixture briefly before coating.
- Ensure shrimp are thoroughly dried before coating to prevent sogginess.
- Use a wire rack on the baking sheet for better air circulation and crispier results.
Common mistakes and how to fix them
- FORGOT to preheat the oven → Always preheat to ensure even crispness.
- DUMPED in too much oil → Use a light spray for crispy coating without greasiness.
- OVER-TORCHED breadcrumbs → Watch closely; remove once golden, not dark brown.
- MISSED the resting step → Rest briefly after baking for juices to settle.
Quick fixes and pantry swaps
- When shrimp stick, splash a little more oil or spray before baking.
- If coating falls off, gently press breadcrumbs onto shrimp again and chill briefly.
- Overcooked shrimp turn rubbery; set a timer and remove promptly when pink.
- DUMPED salt into breadcrumbs → rinse shrimp first or skip salt in coating for better control.
- Splash a few drops of lemon juice after baking for extra brightness.
Prep, store, and reheat tips
- You can prep the shrimp by peeling, deveining, and coating them in breadcrumbs a day ahead. Keep refrigerated in an airtight container for up to 24 hours. The coating stays crisp if kept dry and covered.
- Store baked shrimp in a single layer in an airtight container. They’ll stay good in the fridge for up to 2 days, but the texture might soften slightly. Reheat in an oven at 180°C (350°F) for 5-7 minutes until crispy and warmed through, with a pleasant crackle.
- For longer storage, freeze the cooked shrimp in a sealed bag for up to 1 month. Thaw overnight in the fridge before reheating. Expect a slightly less crispy exterior, but the flavor remains bright and savory.
- Reheating in the oven helps restore some of that initial crunch. Avoid microwaving, which can make the coating rubbery and dull the aroma. Keep an eye on color and smell — it should smell toasted and fragrant, not burnt or stale.
Top questions about baked shrimp
1. Can I use frozen shrimp?
Use fresh or frozen peeled shrimp; frozen is fine if fully thawed. Fresh feels juicier and cooks more evenly.
2. Can I use frozen shrimp directly?
Yes, just make sure they are fully thawed and patted dry to help the coating stick.
3. Is oil necessary in baking breaded shrimp?
Yes, lightly spray or brush the coated shrimp with oil before baking to get that crispy exterior.
4. How long should I bake the shrimp?
Bake at 220°C (425°F) for 8-10 minutes until pink and crispy. Adjust time if your shrimp are larger or smaller.
5. How do I know when the shrimp are done?
Check for a golden, crispy coating and shrimp that are opaque and firm. They should jiggle slightly but not be rubbery.
6. What type of breadcrumbs should I use?
Use panko breadcrumbs for the crunch, seasoned or plain depending on your flavor preference. Toast lightly for extra flavor.
7. Why spray oil on the shrimp?
Spraying lightly with oil before baking helps achieve that golden, crispy coating without deep frying.
8. Can I make this ahead of time?
Yes, you can prepare and coat the shrimp a day ahead. Keep refrigerated and bake when ready.
9. How do I reheat baked shrimp?
Reheat in a 180°C (350°F) oven for 5-7 minutes until crisp and hot. Avoid microwaving, which makes the coating soggy.
10. What if the coating falls off during baking?
If coating falls off, re-press breadcrumbs onto shrimp, chill briefly, and ensure shrimp are dry before breading.
This baked shrimp recipe is a quiet reminder that simple techniques can turn a favorite dish into something a little lighter but still satisfying. The crisp coating, paired with that bright lemon squeeze, keeps the flavors fresh and lively. It’s a go-to for when I want seafood without the greasy aftermath.
Sometimes, it’s the small tweaks—like baking instead of frying—that make all the difference. No matter the occasion, this dish has a way of feeling special without much fuss. Honestly, it’s the kind of meal I keep coming back to, especially when I need a quick, reliable crunch with minimal cleanup.
I grew up in a small town in Oregon, United States. After years of experimenting (and failing) with recipes, I realized food wasn’t just about cooking—it was about connection.