Mushroom caps are often overlooked as just a side or a garnish, but I see them as a blank slate for flavor. There’s something satisfying about turning what seems simple into a dish that feels a bit more special. Plus, the way the caps hold onto stuffing makes every bite a little surprise of texture and taste.
This recipe came from a moment of craving something earthy and comforting but with a bit of elegance. I love how a simple baked mushroom can transform into a little edible package, perfect for sharing or keeping for yourself. It’s surprisingly forgiving, too—easy to adapt with whatever you’ve got in the fridge.
Focusing on the overlooked beauty of mushroom caps as a canvas for flavor, this recipe elevates the humble mushroom into a centerpiece that’s both rustic and refined, perfect for a casual dinner or an elegant appetizer.
The story behind this recipe
- I remember the first time I discovered how a mushroom cap could be more than just a side—turning it into a little flavor vessel felt like a revelation. It was one of those lazy Sunday afternoons, experimenting with what was lingering in my fridge, and suddenly, the caps just begged for stuffing and baking. That moment stuck with me, the simplicity of it all, yet how special it felt to serve something so humble yet elegant.
- Over the years, I’ve played with different fillings—herbs, cheeses, even a splash of wine—and each time, I’m reminded that the best recipes often come from improvisation. There’s a satisfaction in turning a common mushroom into something that feels like a tiny, edible masterpiece. It’s a dish that invites you to get a little creative and appreciate the natural earthiness of mushrooms.
- heading: ‘The story behind this recipe’
Key ingredients and tips
- Mushroom caps: I look for firm, unblemished caps with a nice smooth top—these hold stuffing better and look more appealing. Skip the slimy ones and choose firm ones that feel heavy for their size; they’re juicier and less likely to collapse during baking.
- Cream cheese: I love the tangy richness it adds, but you can swap in Greek yogurt for a lighter, slightly tangier bite. Just keep in mind it’s a bit more runny, so adjust the stuffing consistency accordingly.
- Garlic: I crush or finely chop it, releasing that pungent, aromatic burst—crucial for depth. If you want milder flavor, roast the garlic beforehand; it turns sweet and mellow, blending smoothly into the filling.
- Fresh herbs: Parsley and thyme are my go-tos—they brighten the earthiness of the mushrooms. Dried herbs can work in a pinch, but they’re more concentrated, so use half as much and crush or crumble them well to wake up their flavor.
- Breadcrumbs: I prefer panko for a crisp topping, but regular breadcrumbs work fine. Toast them lightly in butter or oil first for extra crunch and flavor—nothing kills a topping faster than sogginess.
- Olive oil: I drizzle just enough to moisten the stuffing, adding a smoky, fruity note. Skip it if you prefer a leaner filling, but a little oil helps things brown beautifully and keeps everything moist.
- Lemon juice: A squeeze brightens the whole dish with zesty freshness. If you don’t have lemon, a splash of vinegar can mimic that tang, but nothing beats the lemon for that clean, citrusy pop.
Spotlight on key ingredients
Fresh herbs: Parsley and thyme are my go-tos—they brighten the earthiness of the mushrooms. Dried herbs can work in a pinch, but they’re more concentrated, so use half as much and crush or crumble them well to wake up their flavor.:
- Mushroom caps: I look for firm, unblemished caps with a nice smooth top—these hold stuffing better and look more appealing. Skip the slimy ones and choose firm ones that feel heavy for their size; they’re juicier and less likely to collapse during baking.
- Cream cheese: I love the tangy richness it adds, but you can swap in Greek yogurt for a lighter, slightly tangier bite. Just keep in mind it’s a bit more runny, so adjust the stuffing consistency accordingly.
- Garlic: I crush or finely chop it, releasing that pungent, aromatic burst—crucial for depth. If you want milder flavor, roast the garlic beforehand; it turns sweet and mellow, blending smoothly into the filling.
Notes for ingredient swaps
- Dairy-Free: Swap cream cheese for cashew cheese or blended silken tofu. It won’t be as tangy but keeps the texture creamy.
- Vegan: Use nutritional yeast instead of cheese for flavor, and ground almonds or breadcrumbs for binding. Still tasty, just different vibe.
- Gluten-Free: Replace breadcrumbs with crushed gluten-free crackers or toasted almond meal. Adds a nutty crunch and keeps it light.
- Herb Variations: Swap parsley and thyme for basil or oregano. Different herbs bring new aroma and slightly altered flavor profiles.
- Oil Choices: Use avocado or walnut oil instead of olive oil. They add subtle flavor and work well for drizzling or mixing.
- Citrus Swap: Lemon juice can be replaced with lime or orange zest and juice. Brings a different bright, fresh note.
- Add Spice: Mix in a pinch of smoked paprika or cayenne for a smoky or spicy kick that elevates the earthy mushrooms.
Equipment & Tools
- Baking sheet: To hold the mushrooms while baking evenly.
- Damp cloth: To clean the mushrooms gently without damaging the caps.
- Mixing bowl: To prepare and combine the stuffing ingredients.
- Spoon: For stuffing the mushroom caps carefully.
- Oven: To bake the stuffed mushrooms at consistent temperature.
Step-by-step guide to baked mushroom caps
- Preheat your oven to 200°C (390°F). Gather a baking sheet lined with parchment paper.
- Clean the mushroom caps gently with a damp cloth. Remove stems if desired, but keep them for mixing.
- In a bowl, combine cream cheese, minced garlic, chopped herbs, breadcrumbs, a drizzle of olive oil, and lemon juice. Mix until well blended.
- Using a small spoon, stuff each mushroom cap generously with the filling, pressing slightly to secure.
- Arrange the stuffed caps on the prepared baking sheet, with space in between. Drizzle lightly with olive oil for a golden finish.
- Bake in the oven for 15-20 minutes. Check for a golden top and slightly crispy edges. The filling should be bubbling and the caps tender.
- Once baked, remove from oven and let rest for 5 minutes. The filling will set slightly, making plating easier.
- Serve warm, garnished with additional herbs if desired. Enjoy the earthy aroma and creamy bites.
Let the baked mushroom caps rest for 5 minutes to allow the filling to set. Plate them carefully, garnished with fresh herbs if desired, and serve while warm for maximum creaminess and aroma.
How to Know It’s Done
- The mushroom caps are tender with a slight bounce when pressed.
- The filling is golden and bubbling at the edges.
- The tops of the caps have a light, crispy brown color.
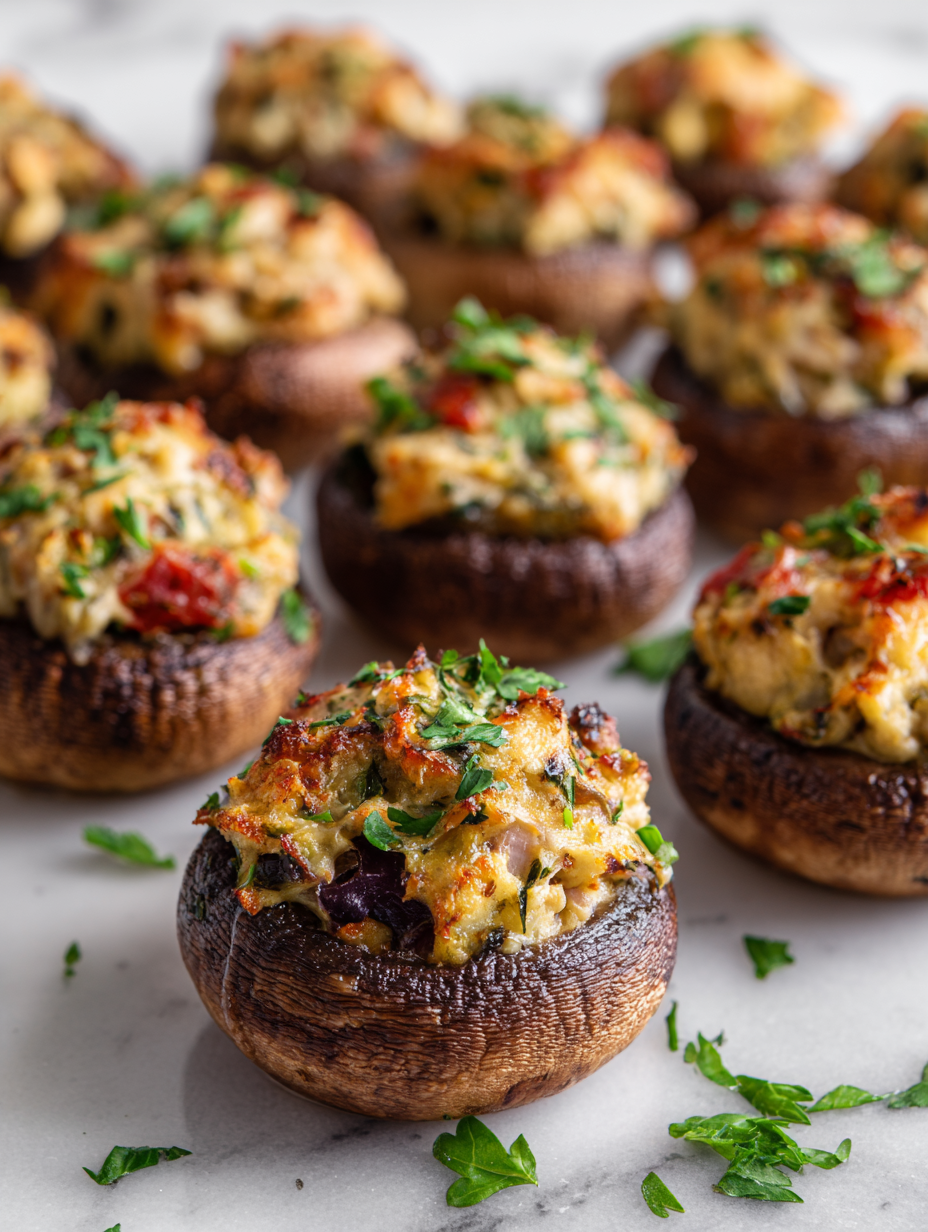
Stuffed Baked Mushroom Caps
Ingredients
Equipment
Method
- Gently clean the mushroom caps with a damp cloth, removing any dirt, then remove the stems if desired, setting them aside for the filling.
- In a mixing bowl, combine the softened cream cheese, finely chopped garlic, chopped parsley, crumbled thyme, toasted panko breadcrumbs, olive oil, and lemon juice. Mix until smooth and well blended.
- Use a spoon to generously stuff each mushroom cap with the prepared filling, pressing slightly to secure the mixture inside.
- Arrange the stuffed mushrooms on a parchment-lined baking sheet, spacing them out evenly. Drizzle lightly with olive oil for a golden, crispy topping.
- Bake in a preheated oven at 200°C (390°F) for 15-20 minutes, until the tops are golden brown and bubbling, and the mushrooms are tender when pierced with a fork.
- Remove from the oven and let rest for 5 minutes; this allows the filling to set slightly and makes handling easier.
- Garnish with extra herbs if desired, then serve warm, enjoying the fragrant aroma and creamy, crispy bites.
Pro Tips for Perfect Mushroom Caps
- Use a small spoon for gentle, even stuffing to avoid overflowing or breaking the mushroom cap.
- Drizzle olive oil over the stuffed caps before baking; it promotes a crispy, golden top with a smoky aroma.
- Bake at 200°C (390°F) until the filling is bubbling and the caps are tender—about 15-20 minutes—check frequently to prevent over-browning.
- For a more even bake, rotate the baking sheet halfway through cooking; this ensures uniform color and texture.
- Broil for the last 2 minutes if you want an extra crispy, slightly charred top—keep a close eye to prevent burning.
- Rest baked mushrooms for 5 minutes before serving; this helps the filling set and makes handling easier.
- If the filling seems too runny, sprinkle a little extra breadcrumbs on top before baking to absorb moisture and add crunch.
Common mistakes and how to fix them
- FORGOT to preheat the oven → Always preheat to ensure even baking and proper crust formation.
- DUMPED filling into the mushroom caps → Stuff gently to avoid overflowing and uneven cooking.
- OVER-TORCHED the tops → Watch carefully, remove once golden to prevent bitterness and dryness.
- MISSED resting time → Rest for 5 minutes to set filling and make handling easier.
Quick fixes and pantry swaps
- When mushrooms release excess moisture, splash a little vinegar to brighten the flavor and help dry them out.
- If filling is too runny, dump in a handful of grated cheese or breadcrumbs to thicken quickly.
- Over-torched tops? Patch with a sprinkle of fresh herbs and a quick broil to revive color and aroma.
- DUMPED filling overflowing? Shield with a piece of foil and bake a few extra minutes for even cooking.
- When in doubt, swap panko for crushed nuts or crispy bacon bits for added texture and smoky aroma.
Prep, store, and reheat tips
- Prep the stuffing mixture up to a day in advance; keep refrigerated to preserve freshness and flavor. The herbs and garlic will mellow slightly, but the aroma remains inviting.
- Clean and remove stems from mushroom caps beforehand. Store in an airtight container in the fridge for up to 24 hours. Keep them dry to prevent sogginess.
- Assemble the stuffed mushrooms just before baking. They can sit, covered loosely with plastic wrap, in the fridge for up to 4 hours without losing texture or flavor.
- Reheat leftovers in a 180°C (350°F) oven for about 10 minutes until bubbling and heated through. The tops may crisp up again, releasing a toasty aroma and slight crackle.
- For the best sensory experience, serve immediately after reheating. The filling should be creamy and the mushroom caps tender, with an inviting earthy scent.
Top questions about baked mushroom caps
1. How do I pick the best mushroom caps?
Choose firm, unblemished caps that feel heavy and look smooth. Avoid slimy or soft mushrooms; they won’t hold up well during baking.
2. Can I use a different cheese or dairy in this recipe?
Yes, you can substitute cream cheese with Greek yogurt for a lighter, tangy filling. It’s a bit more runny, so adjust the texture accordingly.
3. What’s the ideal baking temperature and time?
Bake at 200°C (390°F) for 15-20 minutes until the filling is bubbling and the caps are tender. Keep an eye on the tops for a golden finish.
4. How do I stuff the mushroom caps properly?
Stuff the caps gently with a small spoon to avoid overflowing. Press slightly to secure the filling, then drizzle with oil for even browning.
5. How should I prepare the garlic for the filling?
Use a sharp knife or garlic press to crush garlic, releasing its aromatic oils. Roast garlic beforehand for a milder, sweeter flavor if desired.
6. Can I prepare the filling or assembled mushrooms ahead of time?
Store prepped stuffing mixture in the fridge up to 24 hours. Assemble the stuffed mushrooms just before baking for best texture and flavor.
7. How do I reheat baked mushroom caps?
Reheat leftovers in a 180°C (350°F) oven for about 10 minutes until bubbling. The tops may crisp up again, reviving aroma and texture.
8. What if the mushrooms release too much juice?
If the mushroom caps release too much moisture, splash a bit of vinegar or sprinkle extra breadcrumbs to absorb excess liquid and boost crunch.
9. How do I fix over-torched mushroom tops?
When the tops are overly dark, cover with foil and continue baking. For a quick fix, top with fresh herbs and broil briefly.
10. What are good topping options to add crunch?
Use panko breadcrumbs for a crisp topping, or crush nuts or bacon bits for added flavor and texture. Toast breadcrumbs beforehand for extra crunch.
These baked mushroom caps are a little reminder that simple ingredients can come together into something satisfying. They’re perfect for a cozy night or when you want to impress without fuss. Plus, they smell like earthy, toasted goodness—hard to resist.
Whenever I make these, I’m reminded how a humble mushroom can turn into a little flavorful package. They’re versatile enough to serve as a starter or a snack, and always evoke a sense of homey comfort with that smoky, cheesy aroma filling the kitchen.

Hi, I’m Michael Anderson, the voice behind Overreacting To Salt. Yes, the name usually gets a laugh. And no, I am not actually afraid of salt. In fact, understanding salt and flavor balance is what inspired this entire blog.
 The voice behind Overreacting To Salt. Yes, the name usually gets a laugh. And no, I am not actually afraid of salt. In fact, understanding salt and flavor balance is what inspired this entire blog.
Overreacting To Salt is my space to talk honestly about cooking mistakes, kitchen wins, and the small details that make a big difference in flavor. I created it for home cooks who want to understand food better without feeling intimidated.
The voice behind Overreacting To Salt. Yes, the name usually gets a laugh. And no, I am not actually afraid of salt. In fact, understanding salt and flavor balance is what inspired this entire blog.
Overreacting To Salt is my space to talk honestly about cooking mistakes, kitchen wins, and the small details that make a big difference in flavor. I created it for home cooks who want to understand food better without feeling intimidated.