Making a chocolate fondant is more than just baking; it’s a quiet ritual that demands your full attention. I’ve found that the process of melting the chocolate, measuring the eggs, and carefully timing each step becomes a form of meditation. It’s a small act of mindfulness that transforms a simple dessert into a moment of calm in a hectic day.
There’s something about the tactile feel of the batter and the anticipation of that perfect gooey center that grounds me. It’s not just about the end result, but about turning off the noise for a little while and focusing on each step. When I finally get to crack open that warm, molten chocolate, it’s a small victory and a reminder to slow down.
Focusing on the ritual of making chocolate fondant as a mindful, almost meditative act, turning a simple dessert into a moment of quiet reflection amidst a busy day.
The mindful art of chocolate fondant
- Baking this feels like a quiet rebellion against my hectic afternoons.
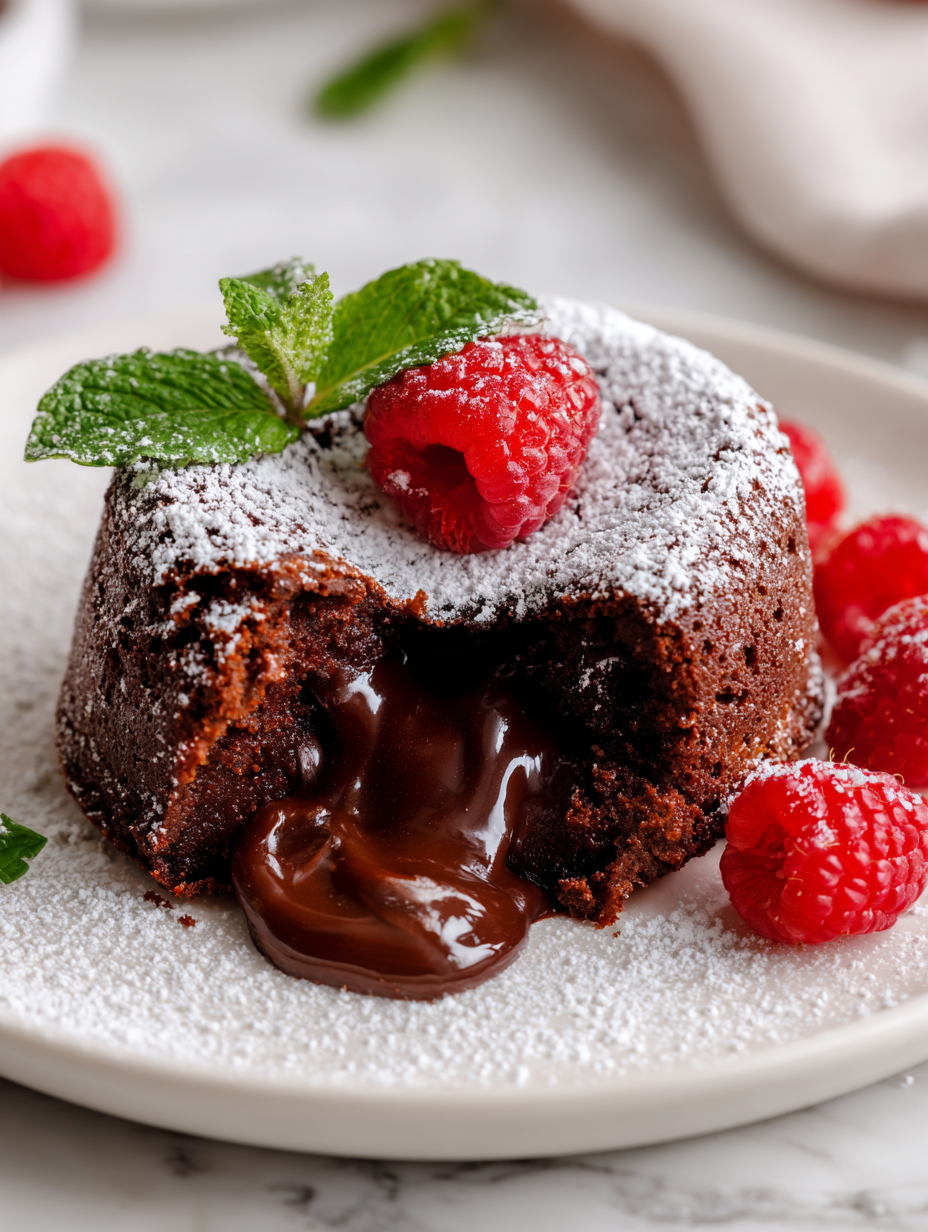
- I love that first spoonful, when the molten chocolate spills out, warm and rich, across my tongue.
- There’s a strange pride in perfecting that slightly cracked crust that hints at the gooey interior.
- Sharing these small, indulgent moments with friends always sparks a quiet, shared joy.
The story behind this recipe
- Making this chocolate fondant always takes me back to a tiny bakery in Paris where I first tasted a perfect one. That moment of biting into the warm, gooey center, with the rich aroma swirling around, felt like pure magic. It’s funny how a simple dessert can hold a place in your memory, like a secret kept between you and that kitchen.
- I started trying to make my own after that trip, chasing that same elusive, luscious center. Each attempt taught me a little more about timing, temperature, and the magic of good chocolate. Now, it’s become a quiet ritual, a way to slow down and indulge in a small, warm moment—no matter how busy the day gets.
- heading
- The story behind this recipe
Chocolate Fondant Trivia & Origins
- Chocolate fondant, also known as molten lava cake, has roots in French pastry traditions from the 1980s.
- The dish was reportedly created by accident when a pastry chef undercooked a cake, revealing its gooey center.
- Its name, ‘fondant,’ refers to the soft, melting texture that contrasts with the firm exterior.
- Many pastry chefs consider the perfect chocolate fondant a test of timing and temperature mastery.
- The dessert gained worldwide popularity after being featured in numerous baking competitions and celebrity chef menus.
Ingredient breakdown: key components
- Dark chocolate: I prefer a rich, slightly bitter bar, the kind that melts slowly and makes my kitchen smell like cocoa heaven. Swap in a semi-sweet if you want less bitterness, but the deep flavor is what makes it special.
- Butter: Use unsalted butter for control over salt levels, and I love how it adds a silky mouthfeel. If you’re out, a neutral oil can work, but it won’t provide the same richness or melt-in-your-mouth texture.
- Eggs: Fresh, large eggs are best—they help the fondant set just right. If you’re in a pinch, use slightly smaller eggs, but don’t skip the yolk, it’s the secret to that gooey center.
- Sugar: I keep it simple with caster sugar for smooth blending. If you only have granulated, blitz it in the food processor first. Too much sugar can dull the gooey texture, so measure carefully.
- Flour: Just a touch for structure—use plain or all-purpose. For a slightly lighter crumb, a spoonful of cornstarch can help, but don’t overdo it or the fondant loses its velvety feel.
- Cocoa powder: A good, unsweetened cocoa gives depth and a hint of bitterness. Sift it well so it doesn’t clump, and if you want a darker bite, opt for Dutch-processed cocoa.
- Salt: A small pinch elevates all the flavors—a secret I never skip. If you like a little more contrast, a tiny sprinkle of sea salt on top before baking works wonders.
Spotlight on key ingredients
Dark chocolate:
- I prefer a rich, slightly bitter bar, the kind that melts slowly and makes my kitchen smell like cocoa heaven. Swap in a semi-sweet if you want less bitterness, but the deep flavor is what makes it special.
- Butter: Use unsalted butter for control over salt levels, and I love how it adds a silky mouthfeel. If you’re out, a neutral oil can work, but it won’t provide the same richness or melt-in-your-mouth texture.
- Eggs: Fresh, large eggs are best—they help the fondant set just right. If you’re in a pinch, use slightly smaller eggs, but don’t skip the yolk, it’s the secret to that gooey center.
Cocoa powder:
- An unsweetened, Dutch-processed cocoa gives a deep, smoky note that contrasts beautifully with the richness of the chocolate. Sift it well to avoid clumps and ensure a smooth batter.
- Eggs: They’re the quiet magic in this recipe—binding, tenderizing, and creating that signature gooey center. Freshness really matters for the best texture and flavor.
- Butter: It’s the base that makes the fondant luscious and silky. Use good quality, unsalted butter, and melt it gently for a smooth incorporation that keeps the batter shiny.
Notes for ingredient swaps
- Dairy-Free: Swap butter for coconut oil or a neutral vegetable oil. You’ll miss some richness, but it still holds together well.
- Vegan Chocolate: Use plant-based margarine or coconut butter instead of butter, and choose a vegan dark chocolate bar. Expect a slightly different melt and flavor.
- Sugar Alternatives: Replace caster sugar with coconut sugar or maple sugar. The texture might be a tad denser, but flavor remains rich.
- Gluten-Free: Substitute all-purpose flour with almond flour or gluten-free baking mix. The crumb will be a bit denser and nuttier.
- Sweetener Boost: Add a splash of flavored liqueur, like Grand Marnier, to enrich the chocolate flavor. Adjust sweetness accordingly.
- Cocoa Powder: Use Dutch-processed cocoa for a smoother, less acidic flavor, or regular cocoa for a brighter, more bitter note.
- Chocolate Types: Incorporate milk chocolate for a sweeter, creamier fondant, or mix dark and milk for complexity. Adjust sugar if needed.
Equipment & Tools
- Ramekins: To bake individual portions evenly and for easy serving.
- Heatproof bowl: To melt the chocolate gently without burning.
- Whisk: To combine eggs and sugar smoothly and incorporate air.
- Sifter: To evenly distribute cocoa powder and flour, avoiding clumps.
- Baking sheet: To hold ramekins securely and facilitate oven handling.
- Cooling rack: To rest the fondants briefly before inverting, preventing sogginess.
Guide to Perfect Chocolate Fondant
- Preheat your oven to 200°C (390°F). Grease your ramekins with butter and dust with cocoa powder to prevent sticking.
- Chop the dark chocolate into small pieces. Melt it gently in a heatproof bowl over simmering water or in short bursts in the microwave, stirring until smooth. Let it cool slightly.
- In a separate bowl, whisk together eggs and caster sugar until light and slightly thickened, about 2-3 minutes. This adds a bit of volume and helps create that tender crumb.
- Pour the cooled melted chocolate into the egg mixture and gently fold together. Add a pinch of salt and vanilla extract if you like a little extra depth.
- Sift in the cocoa powder and a small spoonful of flour, folding just until combined. The batter should be glossy and thick but pourable.
- Divide the batter evenly among your prepared ramekins—about 2/3 full. Place the ramekins on a baking sheet for easy handling.
- Bake for 10-12 minutes. The edges should be set but the center still jiggly when gently shaken. A slight crack on top is good.
- Remove from oven and let sit for 1-2 minutes. Then, carefully invert each fondant onto a serving plate, giving a gentle shake or tap to release.
- Serve immediately while warm. The outer shell should be firm with a molten, oozy center. The aroma of rich chocolate should fill the air.
Let the fondants rest for 1-2 minutes after baking. Invert carefully onto plates, gently tap to release, then serve immediately with a dusting of cocoa or a scoop of ice cream for contrast.
How to Know It’s Done
- Outer shell is firm and slightly cracked, with a shiny appearance.
- Center jiggles gently when ramekin is shaken or tapped.
- A toothpick inserted into the center comes out with moist, melted chocolate.
Chocolate Fondant
Ingredients
Equipment
Method
- Chop the dark chocolate into small pieces and melt it gently in a heatproof bowl set over simmering water or in short bursts in the microwave, stirring until smooth. Set aside to cool slightly.
- Gently melt the butter and mix it into the cooled melted chocolate until fully combined, creating a glossy, smooth mixture.
- In a separate bowl, whisk together the eggs and caster sugar until the mixture becomes pale, slightly thickened, and has a gentle sheen, about 2-3 minutes.
- Pour the cooled chocolate and butter mixture into the egg mixture, folding gently to combine, ensuring a smooth, shiny batter.
- Sift the cocoa powder and flour into the batter, then fold carefully until just combined. The batter should be thick, shiny, and pourable.
- Grease four ramekins with butter and dust with cocoa powder to prevent sticking. Divide the batter evenly among the ramekins, filling each about two-thirds full.
- Place the ramekins on a baking sheet and bake in a preheated oven at 200°C (390°F) for 10-12 minutes. The edges should be set but the center still jiggles gently when shaken.
- Remove the ramekins from the oven and let rest for 1-2 minutes. Then, carefully invert each ramekin onto a serving plate, giving it a gentle tap to release the fondant.
- Serve immediately while warm, showcasing the glossy shell and molten center that spills out as you cut into it.
Pro tips for perfect chocolate fondant
- Use high-quality chocolate for a rich, deep flavor that melts smoothly in the oven.
- Gently fold in the flour and cocoa to keep the batter airy and prevent deflation during baking.
- Chill the ramekins before filling to help the fondant hold its shape and ensure a gooey center.
- Bake until the edges are just set and crack slightly—center should jiggle for perfect ooze.
- Rest the fondants for a minute after baking to allow the molten core to settle just right.
- Invert carefully onto plates to keep the gooey center intact, and serve immediately for best texture.
Common mistakes and how to fix them
- FORGOT to check oven temperature → Use an oven thermometer for accuracy.
- DUMPED batter too quickly → Pour gently to avoid deflating air bubbles.
- OVER-TORCHED the fondant → Remove promptly; edges should be just set, center jiggly.
- MISTAKENLY used cold chocolate → Melt thoroughly to ensure smooth, shiny batter.
Quick fixes and pantry swaps
- When batter is too thick, splash in a teaspoon of warm water to loosen it.
- If fondants crack during baking, lower oven temperature slightly and extend baking time.
- Splash a pinch of salt on top before baking to enhance chocolate flavor and smooth cracks.
- Patch undercooked centers by baking 1-2 minutes more, watching for jiggle and crackle.
- Shield ramekins with foil if edges brown too quickly, preventing over-torching.
Prep, store, and reheat tips
- Prepare the ramekins by greasing and dusting with cocoa powder ahead of time; keep at room temperature until ready to fill.
- You can melt the chocolate and butter a day in advance, then cool and refrigerate the mixture; bring to room temp before folding into eggs.
- The batter can be made up to 2 hours ahead, covered tightly with plastic wrap, and kept in the fridge; the texture may be slightly denser but still gooey.
- Reheat the baked fondants in a 180°C (350°F) oven for about 3-4 minutes until warmed through and the center is oozy; watch for steam and aroma of rich chocolate.
- Store leftovers covered in the fridge for up to 2 days; reheat briefly in the oven or microwave, checking for that perfect molten consistency.
Top questions about chocolate fondant
1. How do I know when my fondant is done?
A gooey center should jiggle slightly when the fondant is properly baked, but not be runny or liquid. It’s all about timing and oven accuracy.
2. What if my fondant is overcooked?
If the edges are too firm and the center isn’t molten, bake for an extra minute. Conversely, if it’s overdone, reduce the baking time slightly next round.
3. Should I chill the ramekins before baking?
Chill your ramekins beforehand to help the batter hold its shape and improve the oozy center. A quick stint in the fridge makes a difference.
4. Can I prepare the batter in advance?
Yes, the batter can be made ahead, covered tightly, and stored in the fridge for up to 2 hours. Just bring it to room temperature before baking.
5. Can I use milk chocolate instead?
Use high-quality dark chocolate for the richest flavor and the best melt-in-your-mouth texture. Cheaper chocolates may result in a duller taste and less glossy finish.
6. My fondant sticks or cracks when I invert it, what do I do?
If the fondant cracks or doesn’t release easily, ensure the ramekins are well-greased and dusted with cocoa powder, and invert gently to avoid breaking the shell.
7. How long should I bake my fondant?
Bake at exactly 200°C (390°F) and keep a close eye after 10 minutes. The edges should be set and slightly cracked, with a jiggly center.
8. How do I reheat leftover fondant?
To reheat leftovers, warm in a 180°C (350°F) oven for 3-4 minutes until the center is molten and fragrant. Avoid microwaving to prevent overcooking.
9. My batter is too thick or thin, what can I do?
If the batter feels too thick, gently fold in a teaspoon of warm water. If it’s too thin, add a small spoonful of flour or cocoa powder.
10. What are the most important ingredients for success?
The key is to use fresh eggs and good quality chocolate. These give the fondant its tender crumb and luscious, melting core every time.
Baking this chocolate fondant is a small act of patience that rewards with a rich, molten center and a warm, inviting aroma. It’s a reminder that the simplest ingredients, treated with care, can create moments of quiet pleasure. Sometimes, the best comfort comes from a little chocolate and a moment of mindful focus.
Whether it’s for a special occasion or a spontaneous treat, these little pots of gooey goodness bring a fleeting but memorable joy. There’s a quiet satisfaction in pulling them out of the oven, watching the cracked crust give way to that luscious, flowing center. It’s a simple pleasure worth savoring, one spoonful at a time.

Hi, I’m Michael Anderson, the voice behind Overreacting To Salt. Yes, the name usually gets a laugh. And no, I am not actually afraid of salt. In fact, understanding salt and flavor balance is what inspired this entire blog.
 The voice behind Overreacting To Salt. Yes, the name usually gets a laugh. And no, I am not actually afraid of salt. In fact, understanding salt and flavor balance is what inspired this entire blog.
Overreacting To Salt is my space to talk honestly about cooking mistakes, kitchen wins, and the small details that make a big difference in flavor. I created it for home cooks who want to understand food better without feeling intimidated.
The voice behind Overreacting To Salt. Yes, the name usually gets a laugh. And no, I am not actually afraid of salt. In fact, understanding salt and flavor balance is what inspired this entire blog.
Overreacting To Salt is my space to talk honestly about cooking mistakes, kitchen wins, and the small details that make a big difference in flavor. I created it for home cooks who want to understand food better without feeling intimidated.